Jotform Enterprise is committed to making your life easier by helping you streamline repetitive tasks and automate workflow processes. So it shouldn’t be a surprise that we’ve developed a more efficient way to manage your busy schedule.
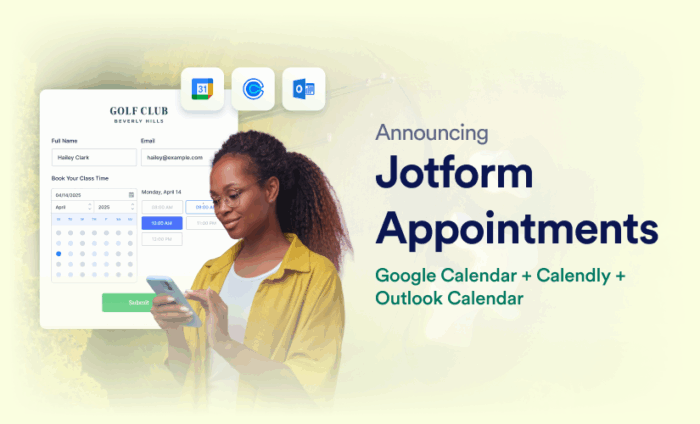
Jotform Enterprise is excited to announce Jotform Appointments, a two-way sync feature for integrations with Google Calendar, Outlook Calendar, and Calendly.
You asked, we answered
A two-way sync with calendar integrations was the No. 1 feature request from users for managing appointments in Jotform. Jotform Appointments provides two-way connections between the appointment field in your forms and Google Calendar, Outlook Calendar, or Calendly, ensuring that people can only book available times on your calendar.
The two-way calendar integrations streamline the booking process by allowing your form to “see” your availability and avoid double-bookings or overwritten events. Whether you’re managing client meetings, consultations, or team sessions, Jotform Appointments makes scheduling effortless.
Who benefits from appointment automation?
Scheduling automation can be helpful in any sector. More efficient scheduling allows you and your team to focus more on the work that matters.
Here are some specific use cases:
- HR teams rely heavily on their calendars to manage everything from candidate interviews to important internal meetings. Let’s say an HR team uses Jotform Enterprise to schedule interviews with job applicants and Outlook Calendar to manage appointments companywide. With Jotform Appointments, the appointment field in Jotform syncs with their Outlook Calendar, so that booked time slots are hidden in the form. When a candidate selects an interview time and submits the form, a new meeting is automatically created in the HR representative’s Outlook Calendar.
- Healthcare professionals can use Jotform Enterprise to allow patients to book appointments online. For example, a doctor’s office could use an appointment form that links directly to the doctor’s Google Calendar. A patient can only select from available slots based on the doctor’s real-time availability in Google Calendar. Once a patient submits the form, the integration creates a corresponding event in the doctor’s calendar that includes information from the appointment form, like the patient’s contact information and the reason for their visit.
- Educators also need an accurate way to schedule appointments, like parent-teacher conferences and office hours for students. For example, a school guidance counselor can use Jotform Enterprise to create an appointment form to schedule a 1-on-1 session with a student that syncs with their Outlook Calendar. The appointment field in Jotform will only show students available time slots. When a student selects a time and submits the form, the appointment is immediately added to the counselor’s Outlook Calendar, along with details from the form like the purpose of the meeting.
- Sales teams can use a Jotform Enterprise appointment form synced with Calendly to schedule meetings with potential clients. Team members can manage their availability through Calendly and use Jotform Enterprise to collect client information. When a potential client makes an appointment through the form, it will appear automatically in Calendly, along with client details captured from the form.
- Nonprofit organizations use calendars to track fundraising activities, manage volunteer shifts, and schedule appointments with community members, to name a few examples. With Jotform Appointments, a nonprofit professional could send a customized appointment form to a donor. When a donor completes the form, the appointment is automatically created in the nonprofit professional’s Google Calendar. This provides a seamless way to maintain communication and nurture relationships between the organization and its donors.
No matter who you are or what calendar integration you use, this new functionality can further maximize your productivity by simplifying scheduling.
The options are endless!
How to set up two-way sync for appointments
The two-way calendar sync in Jotform Appointments enhances Jotform Enterprise’s integrations with calendar tools by blocking off time slots that are already booked.
Whether a slot is filled through your Jotform appointment form or directly in your calendar of choice, it will no longer be available for others to book. This syncing of data lets you effortlessly avoid double-bookings and streamline your scheduling process.
Let’s explore how to set up appointments with each calendar provider.
For Google Calendar
First, let’s walk through how to use Jotform Appointments with Google Calendar.
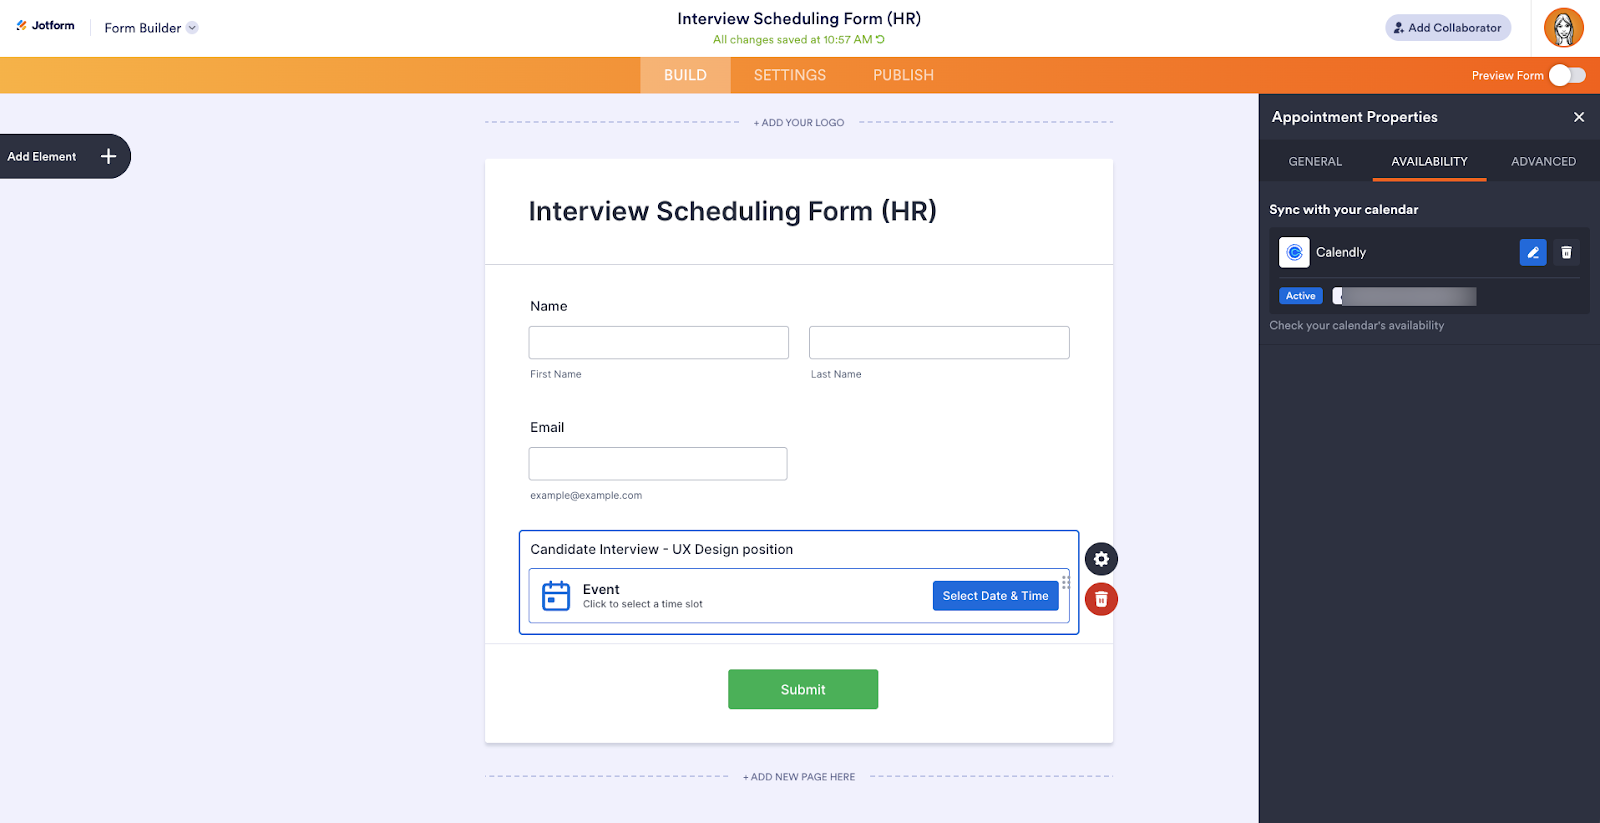
Imagine you’re an HR manager looking to hire a UX designer for your marketing team. If you’re scheduling appointments with a lot of candidates, automating the process can be a huge help. Here’s how to do it using an interview scheduling form in Jotform Enterprise.
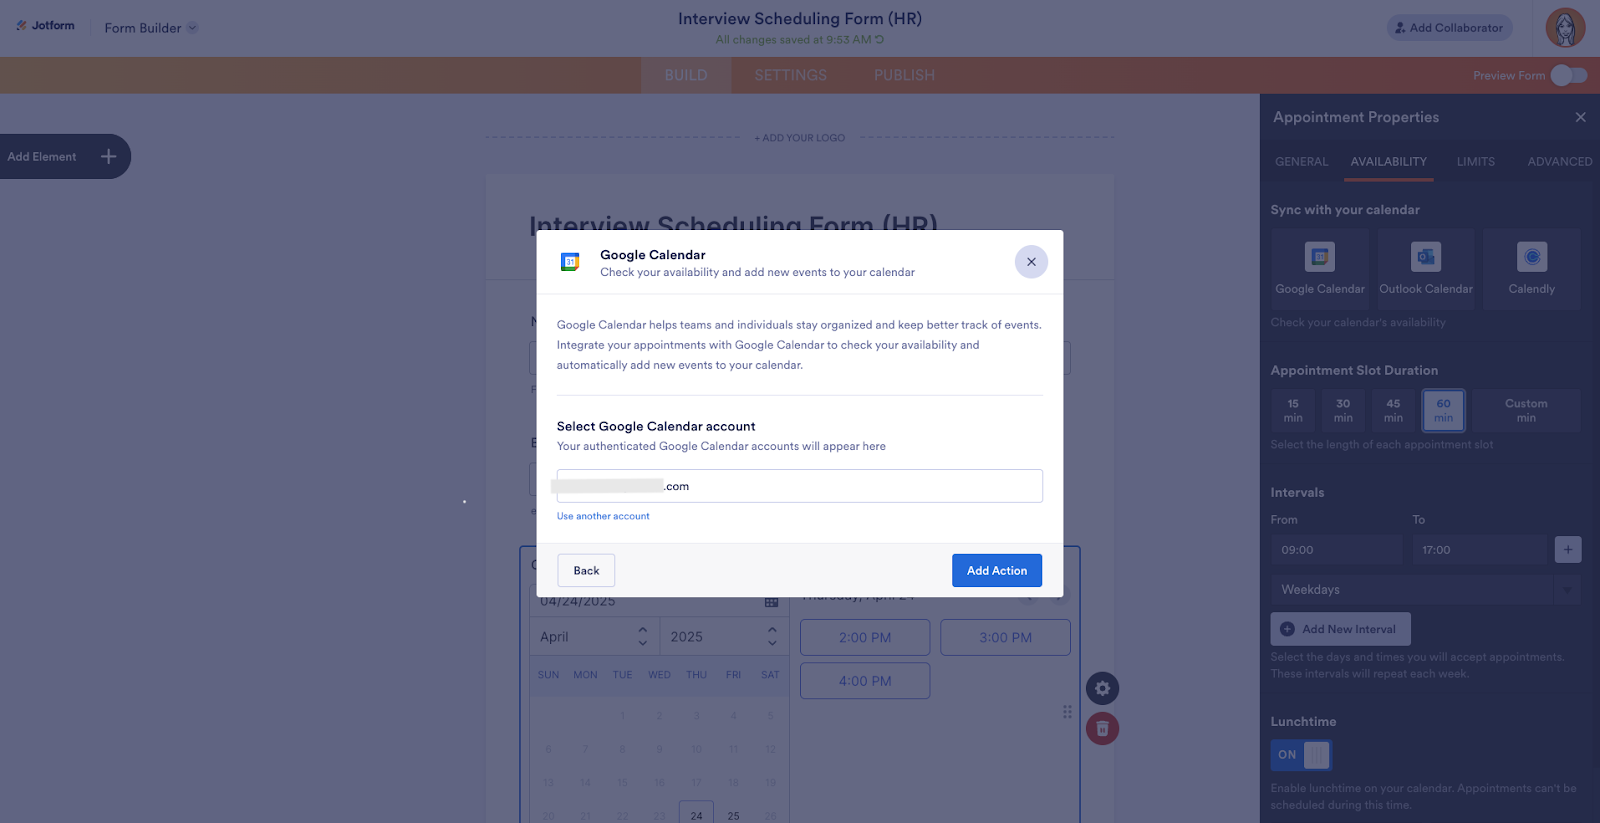
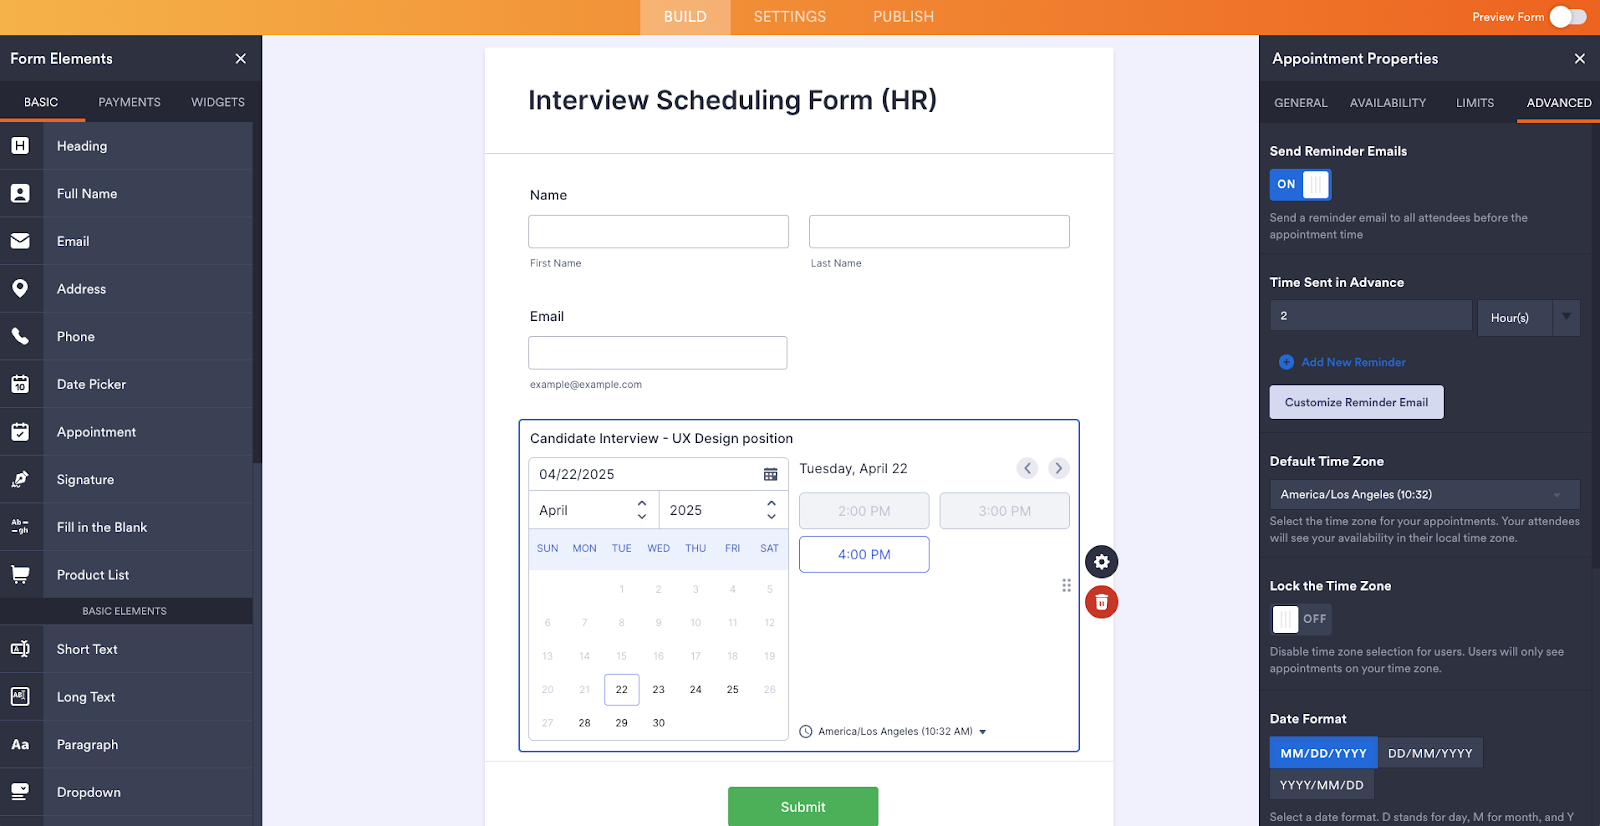
In the Form Builder, drag and drop the Appointment field into your form from the Form Elements menu on the left. When you click the gear icon next to the field, the calendar sync options appear on the right.

Under the Availability tab, you have the option to select
- The calendar you want to sync. For this example, we’ll use Google Calendar.
- Appointment duration. I’ve selected 60 minutes.
- The days of the week and hours that people can schedule appointments with you
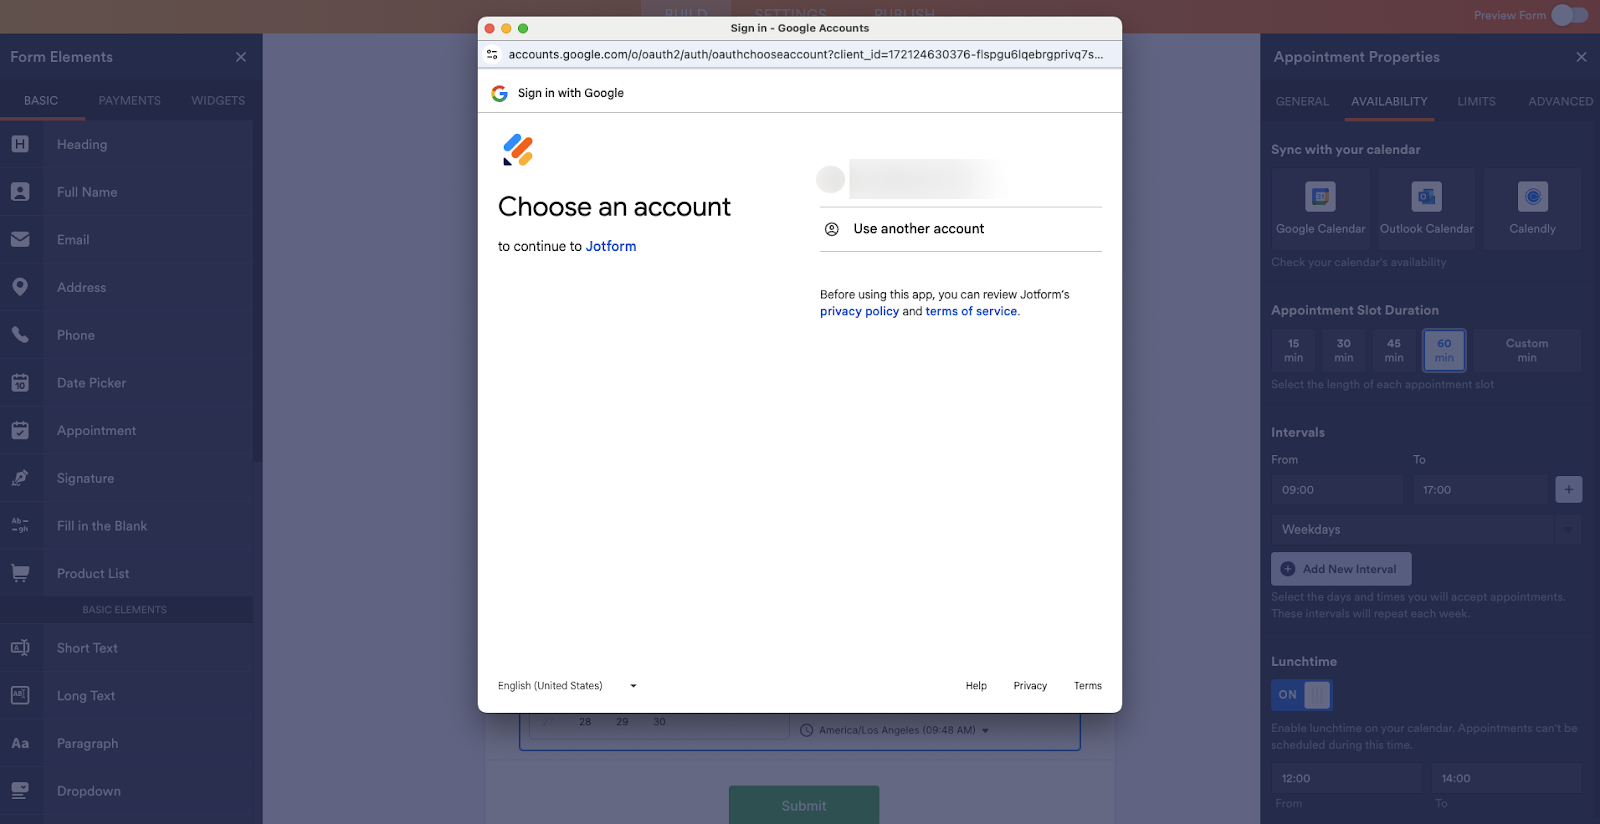
Select Google Calendar. You’ll be asked to authenticate the request. You’ll also be able to choose which Google account you’d like to sync.
Once you have authenticated the integration, you can select the account to sync.
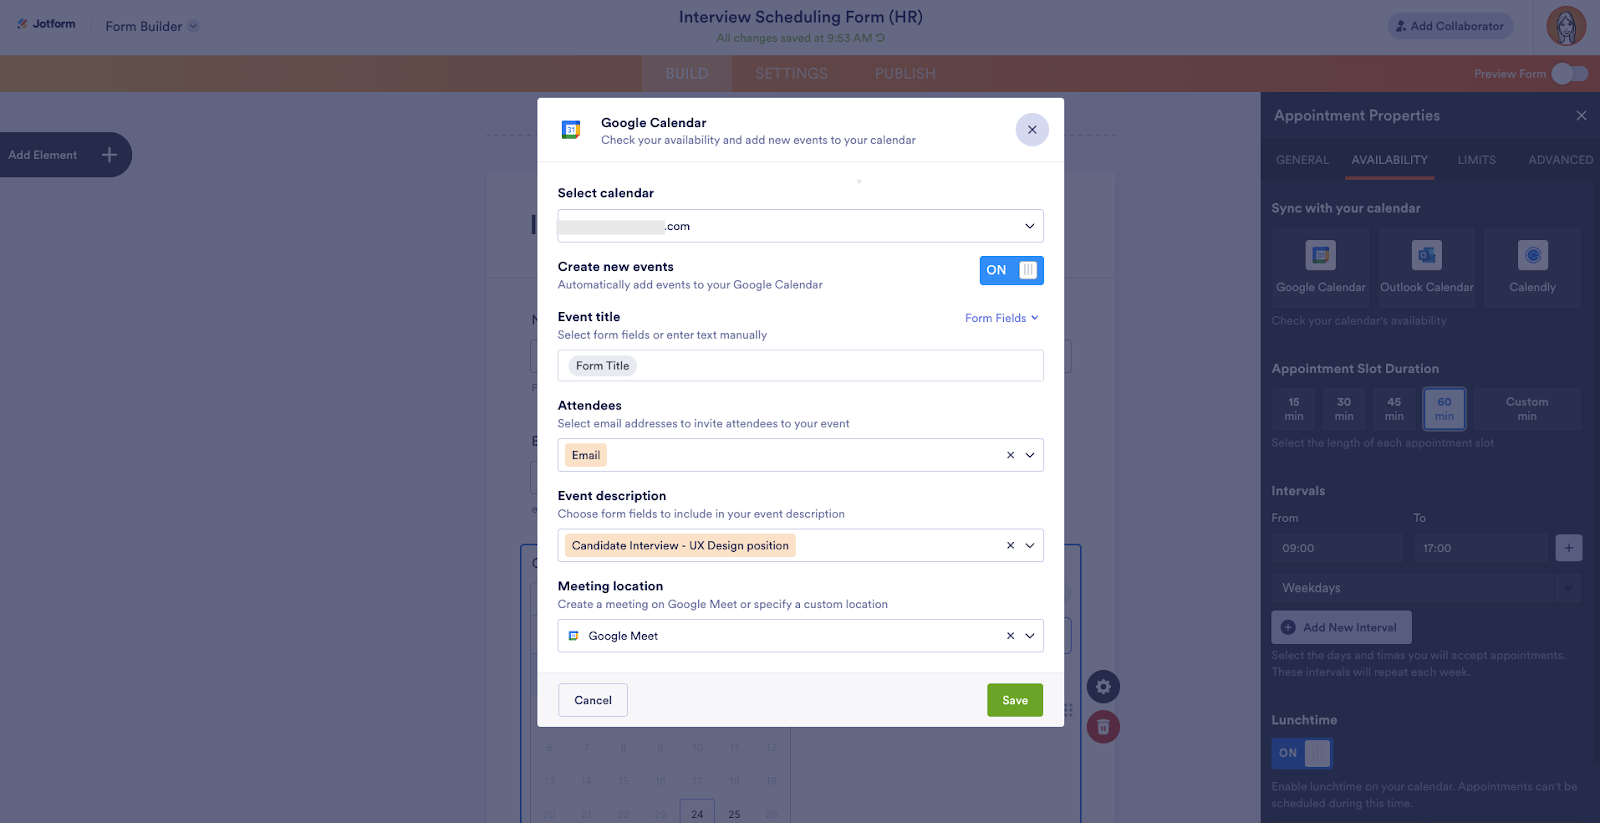
Next, you can choose what information from the appointment form you’d like to include in the calendar event. In the example below, I’ve set the appointment form title as the name of the calendar event, and I’ve included the applicant’s email in the attendee field. I’ve also added the information I need to know about their application in the event description.
Finally, you can add a meeting location. You can pull the options from a meeting location field in your form, choose Google Meet, or set another custom option, like an alternate video conferencing tool. Click Save when you’re finished.
Your integration with Google Calendar is now set up. If you ever need to edit (or delete) your settings, return to the Availability tab in the Appointment Properties and click the pencil icon next to Google Calendar.
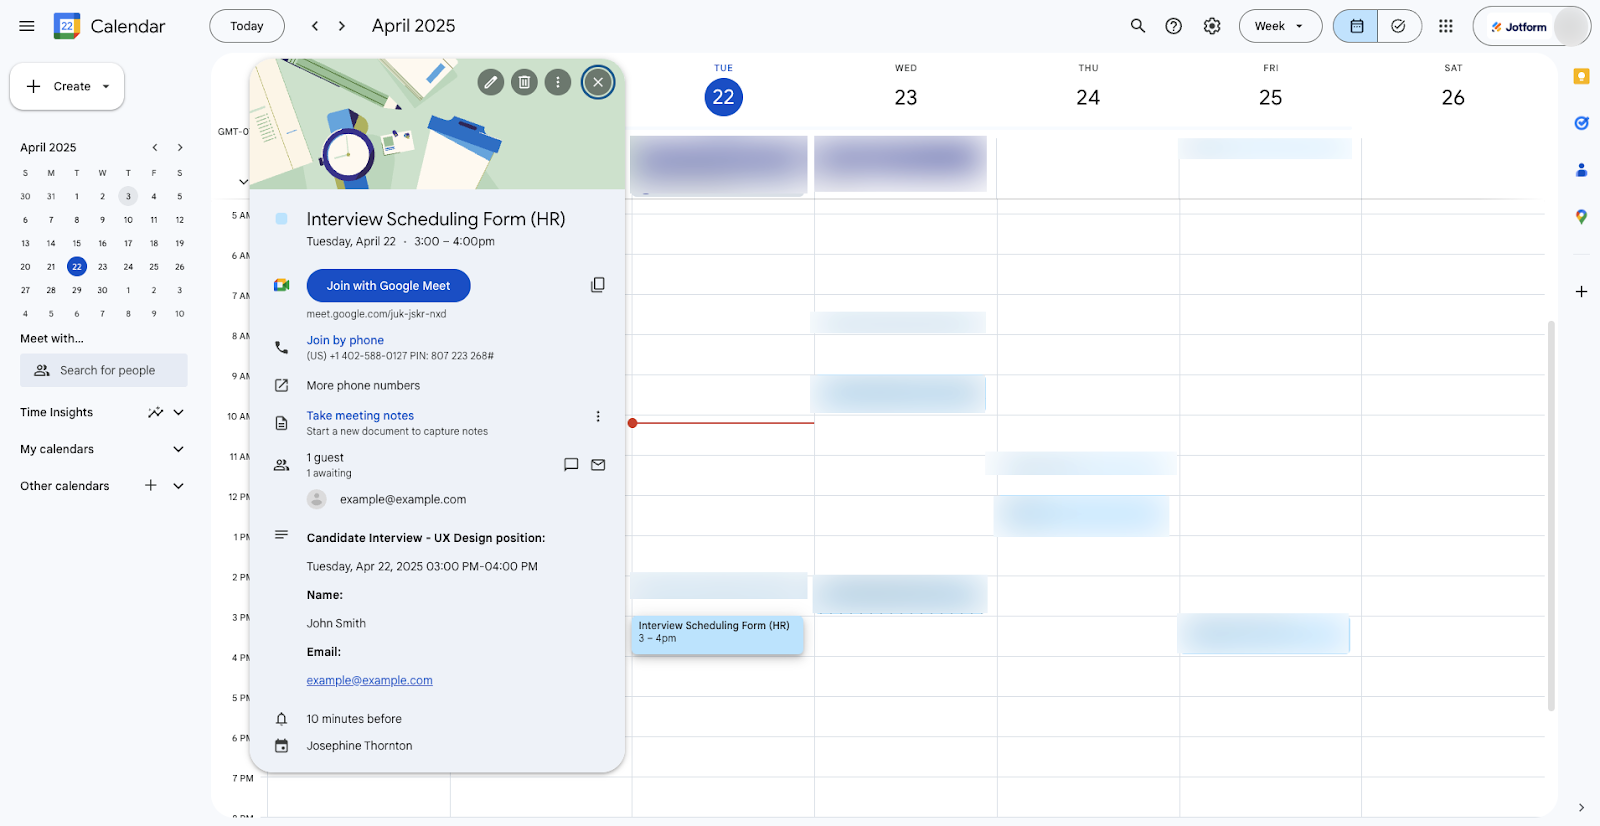
Now that your appointment settings are synced with your Google Calendar, when a candidate fills out an appointment form, they will only see the days and times that you’re available for a 60-minute meeting.
When someone submits the form, you’ll see a new appointment on your calendar that includes the information you’ll need to prepare for the video conference meeting.
Did you know?
The Limits and Advanced tabs in Appointment Properties give you additional options for customizing your appointments, like the default time zone, the maximum number of appointments available per day, and more.
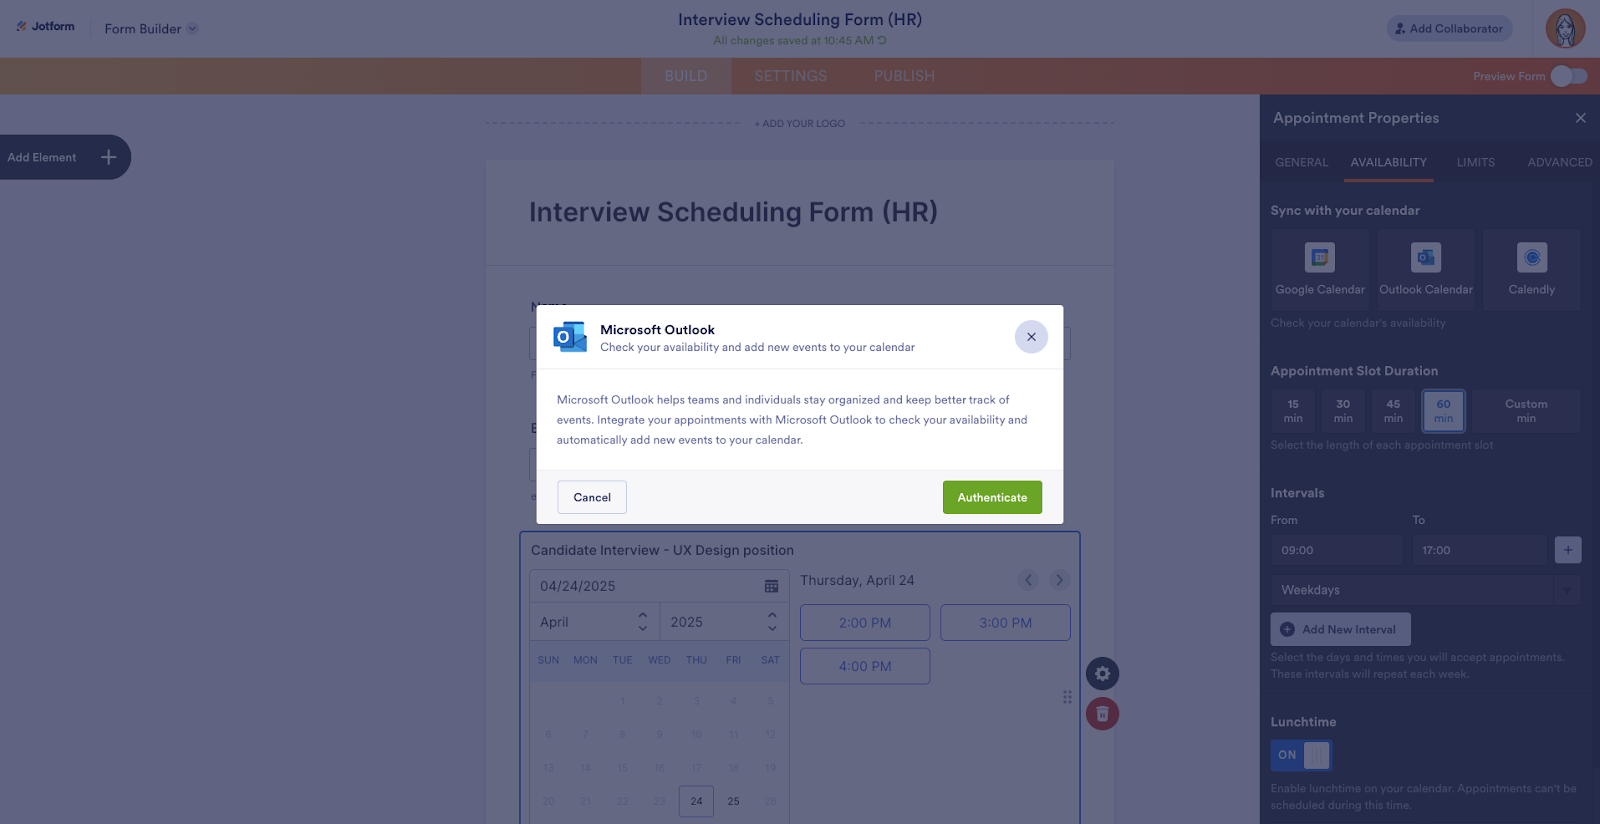
For Outlook
The setup for Outlook Calendar is similar to Google Calendar. Once you’ve added the appointment field to your form, choose to sync with your Outlook calendar.
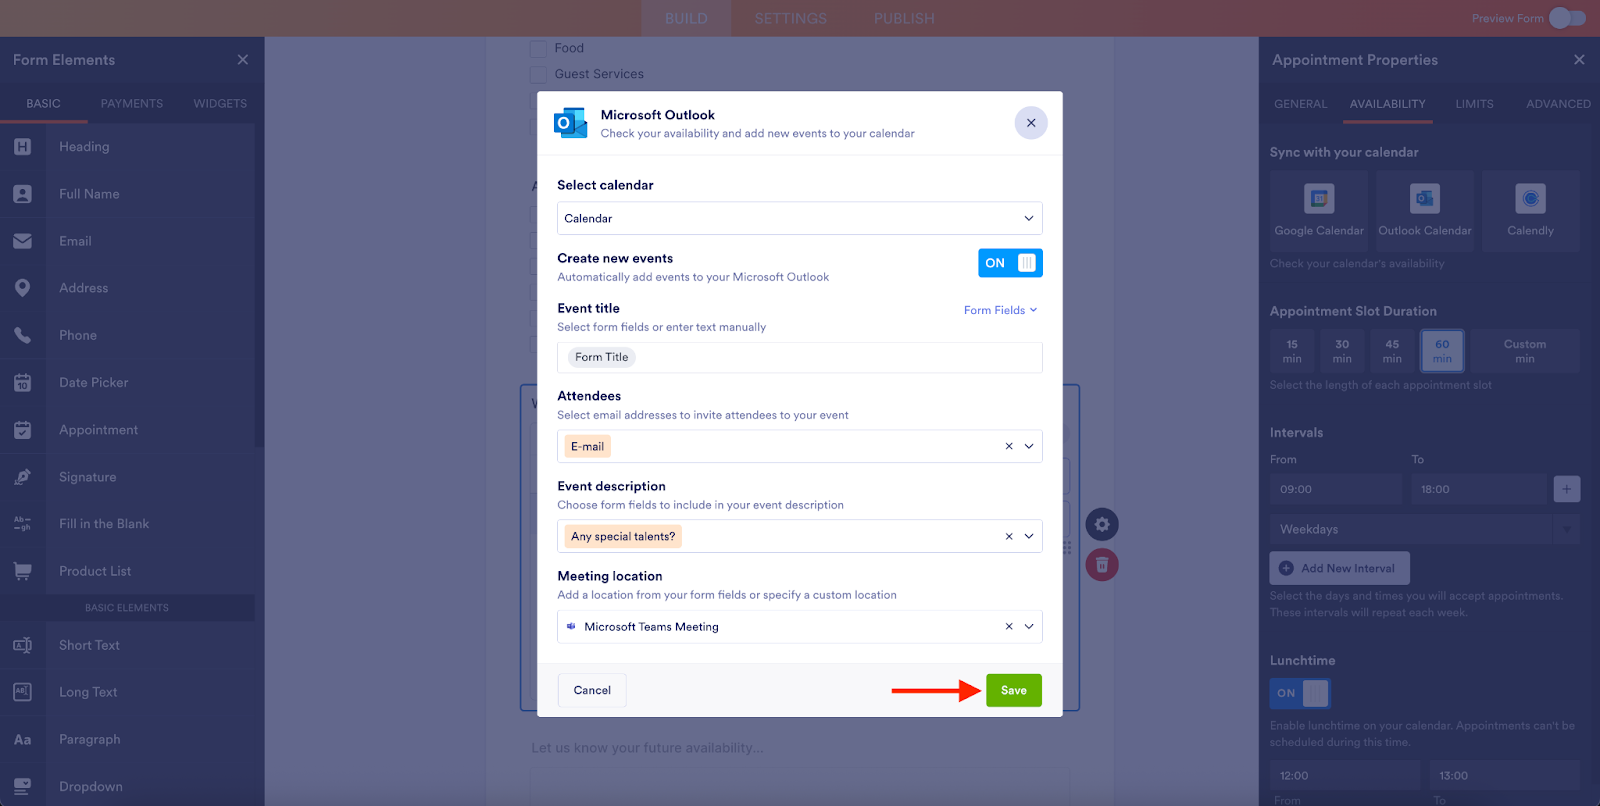
After choosing the account you’d like to sync, you can customize the details of your Outlook Calendar meeting.
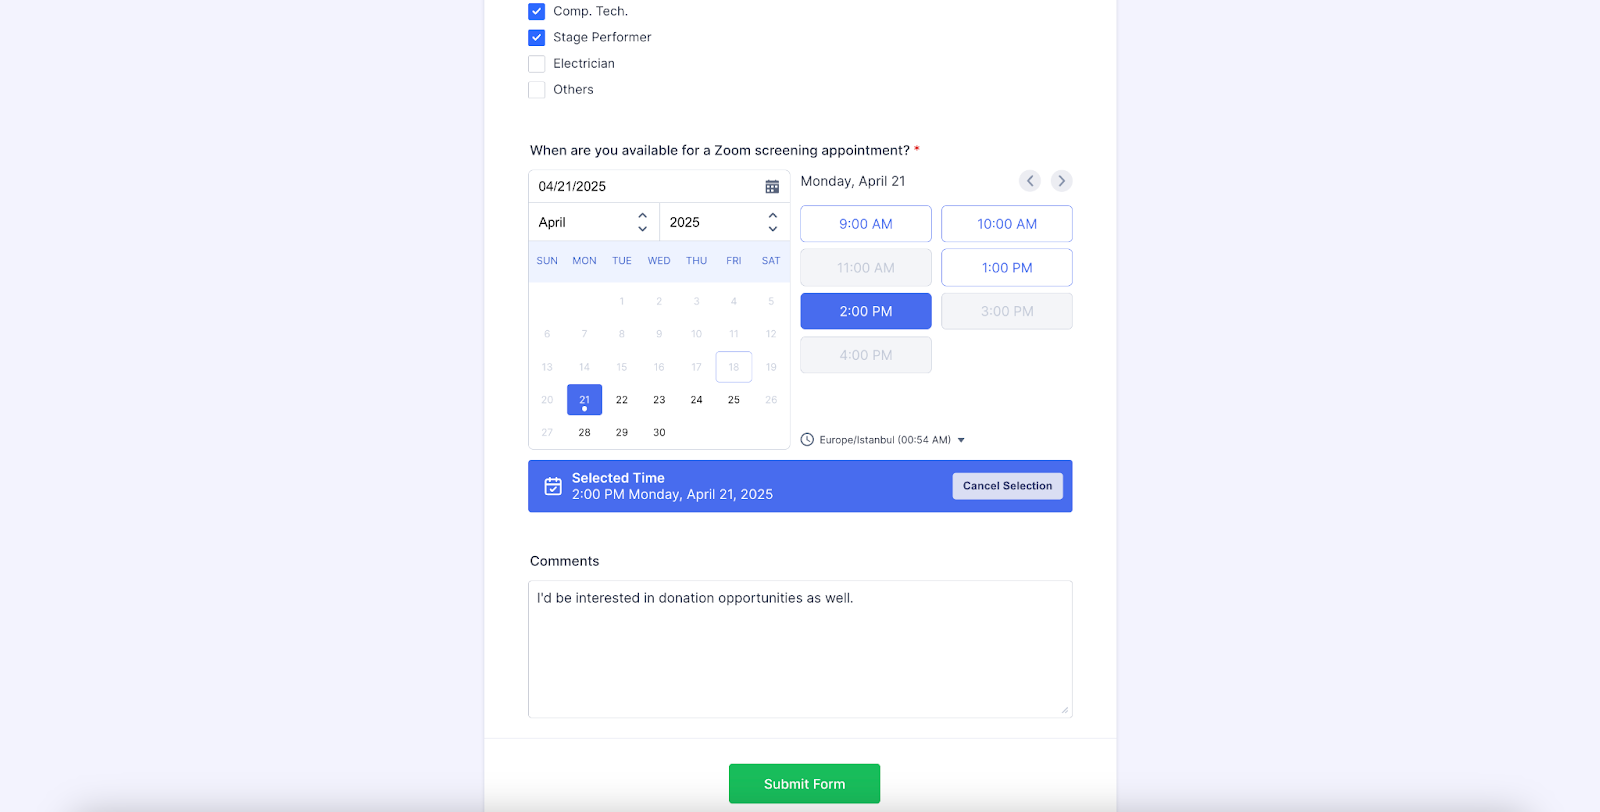
In this example, I’ve selected the calendar I’d like to connect to in Outlook and set the calendar event title to match the appointment form title. I’ve also changed the event description to include comments. My custom meeting location will be Microsoft Meet.
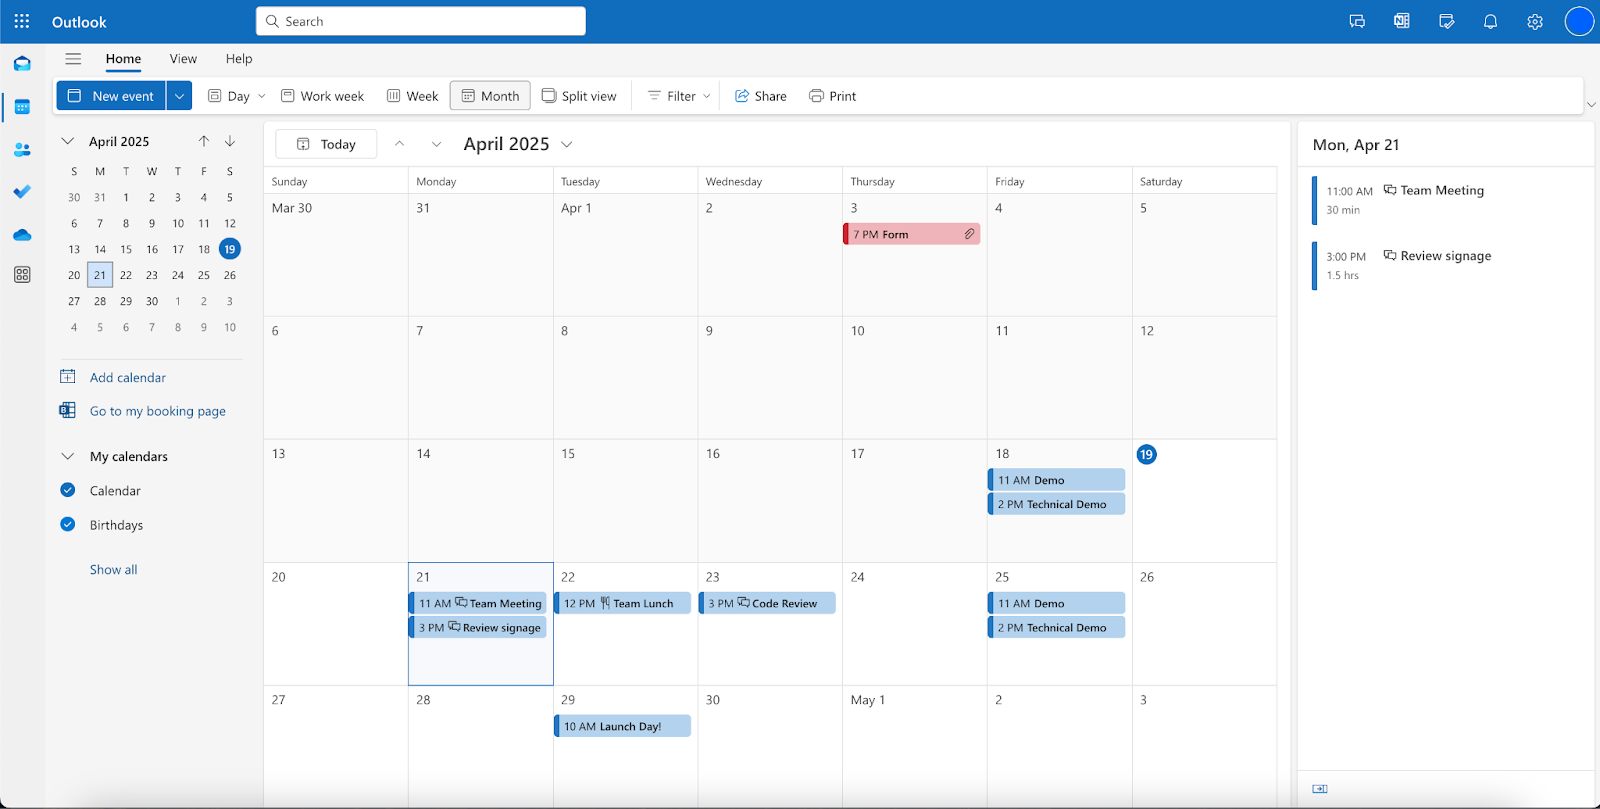
Here’s my sample Outlook Calendar, showing my availability for April 21.
Pro Tip
You can include multiple appointment fields in the same form to offer different types of appointments. You can also use conditional logic to show different appointment options (in your forms or Workflows), based on what the respondent selects. This option is great for businesses that offer a variety of services and needs to manage multiple appointment types in one calendar.
When someone tries to schedule an appointment on April 21st, the form shows them only available 60-minute windows (during the hours I’m available for appointments). Any time slot that is already booked with a meeting in my Outlook Calendar is grayed out.
When someone submits the appointment form, the new appointment immediately displays in my Outlook Calendar.
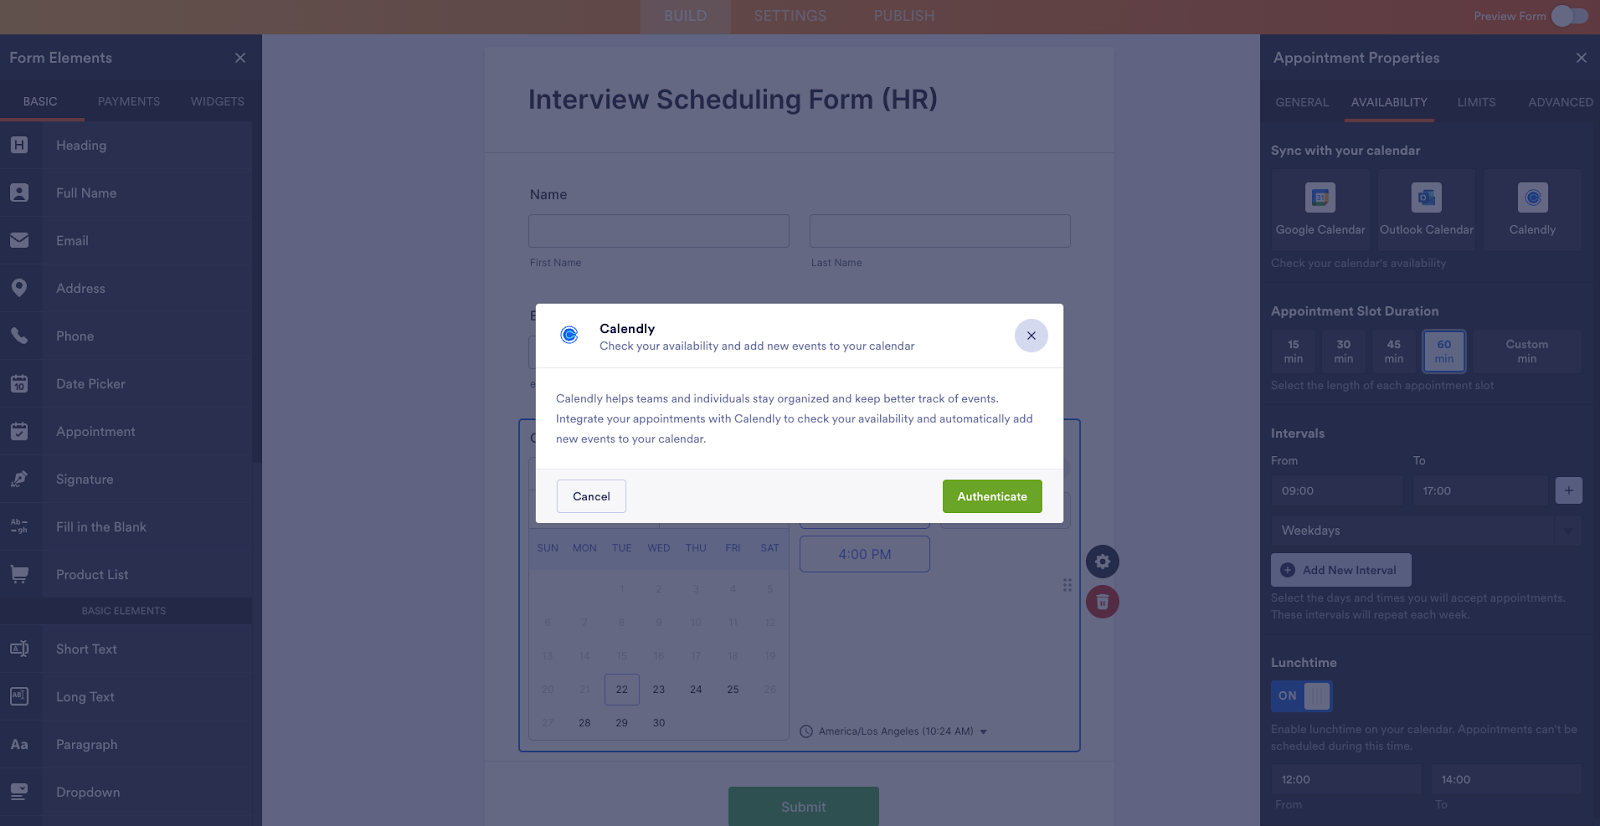
For Calendly
Calendly is an appointment scheduling tool that connects to Google Calendar, Outlook Calendar, Google Meet, Zoom, and other appointment software. So syncing Calendly to your forms differs slightly from the previous examples.
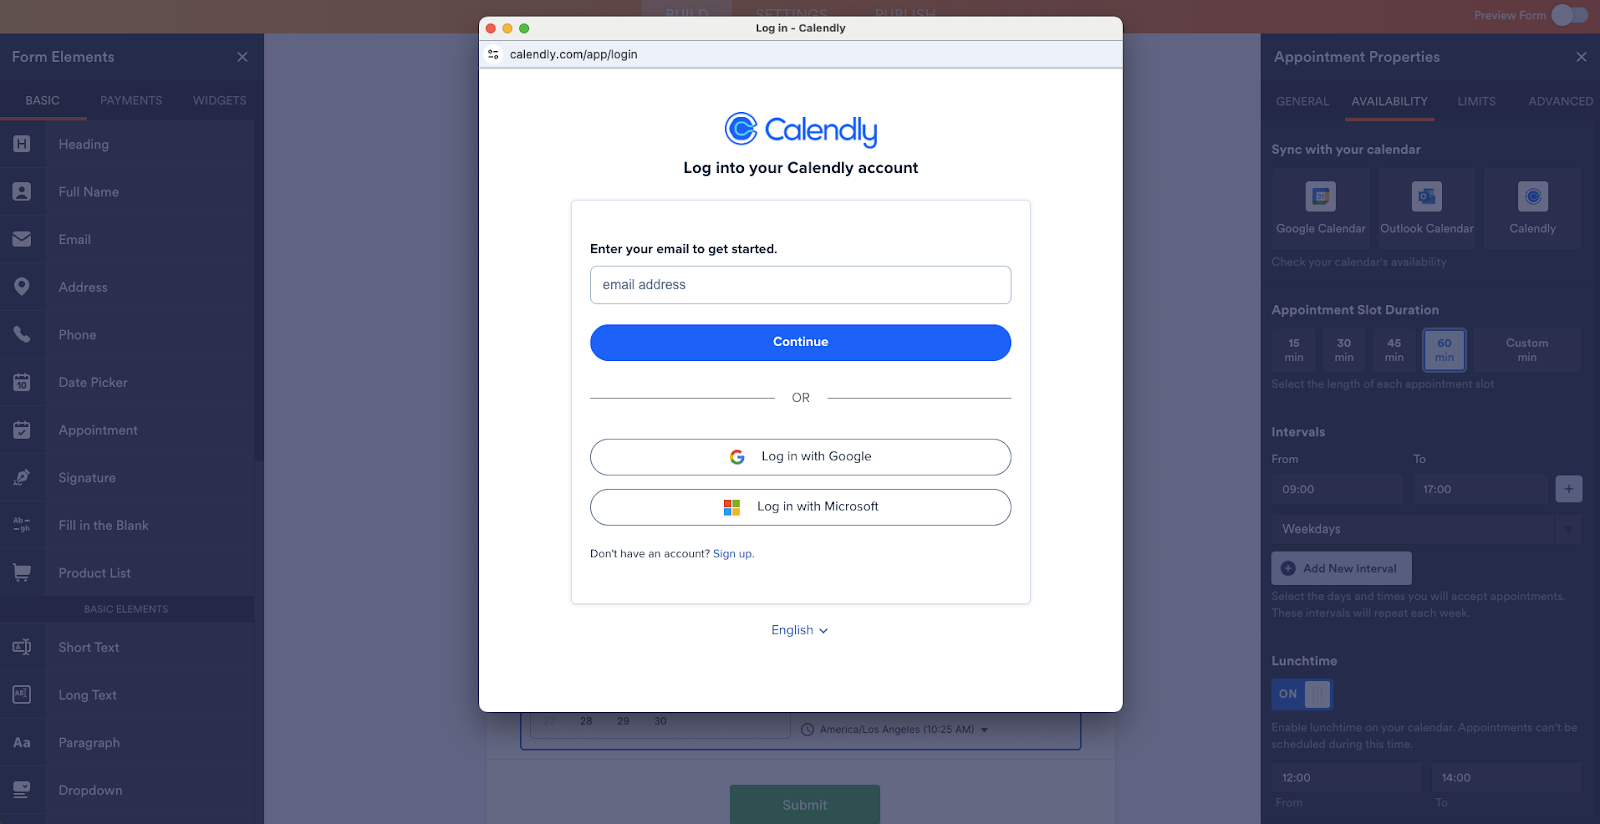
First, select Calendly as your calendar sync option, and click Authenticate to connect your account.
Next, you’ll see a pop-up asking permission to connect to your Calendly account.
Once you’ve connected Jotform with your Calendly account, click the Add Action button to access your appointment settings.
Choose the Jotform appointment form you’d like to sync to your calendar. You can also map the Calendly fields to your Jotform form fields to save the relevant details in your Calendly booking. Once you have configured your settings, click Save.
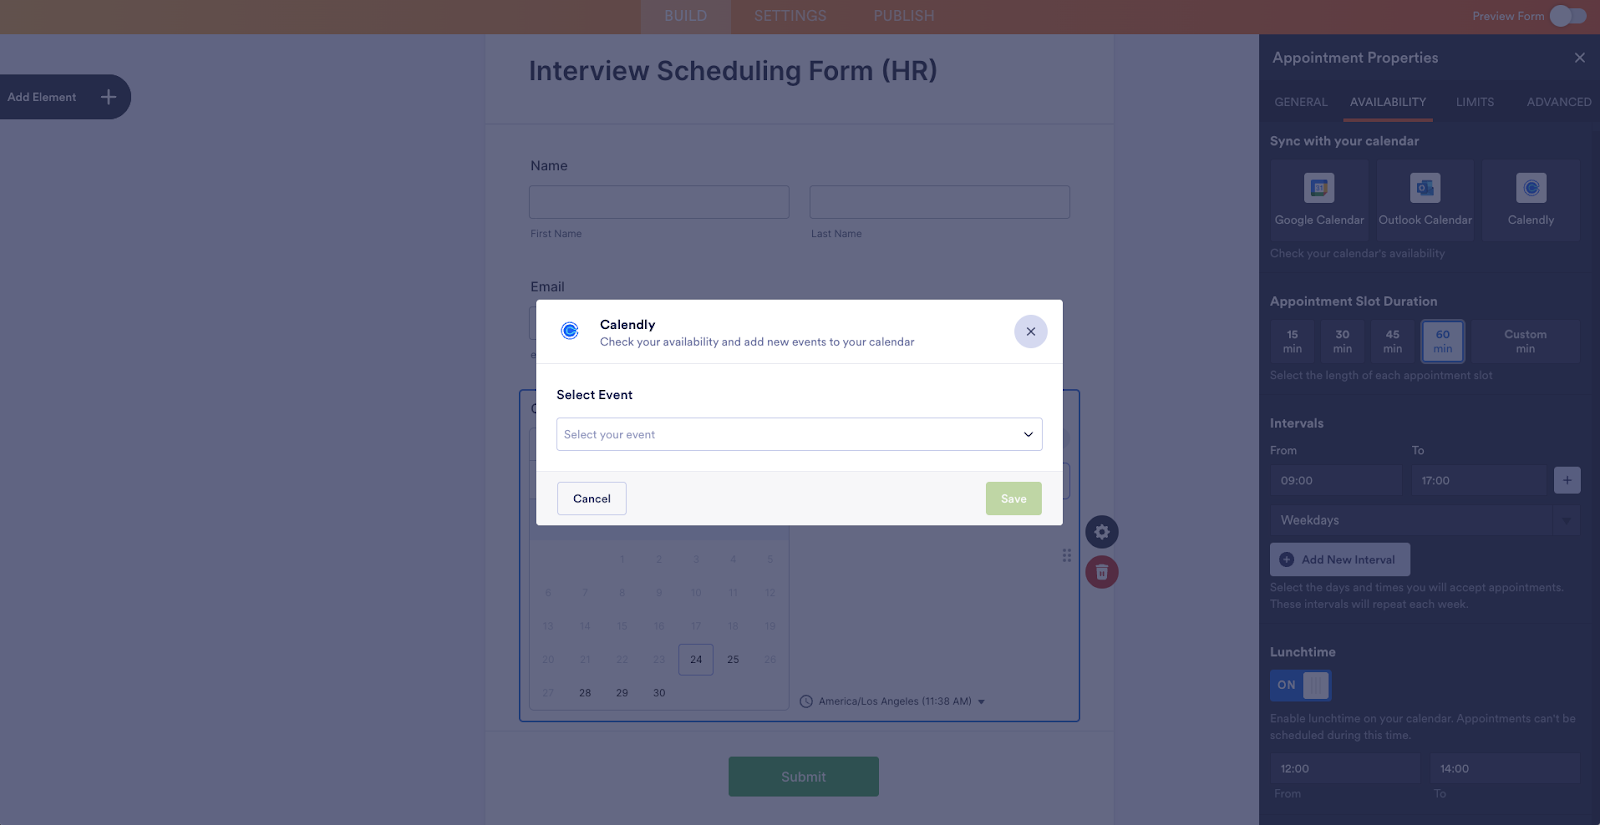
You’ll notice that the Calendly integration displays differently in the appointment field than Google Calendar and Outlook Calendar examples. The user will click the Select Date & Time button to see available appointments in a Calendly pop-up.
Here are a couple of things to be aware of with the Calendly appointment option:
- Your appointment field settings will be managed in your Calendly account, but will translate to your form.
- Calendly is currently not compatible with Jotform Enterprise’s HIPAA servers.
Setting up email confirmations
Reduce meeting no-shows and keep your appointment attendees prepared by using the Reminder Email feature. You can access this feature from the Advanced tab of the Appointment Properties.
Toggle on the Send Reminder Email option and set the number of reminders you want to send to your meeting attendees.
You can customize how many hours before your meeting to send the email(s). You can also customize the look and feel of the emails, the recipients, and include as much or as little information as you’d like.
Set appointments and collect payments at the same time
For businesses that need to collect payments as well as schedule appointments, like healthcare clinics, Jotform Appointments can streamline both processes at once.
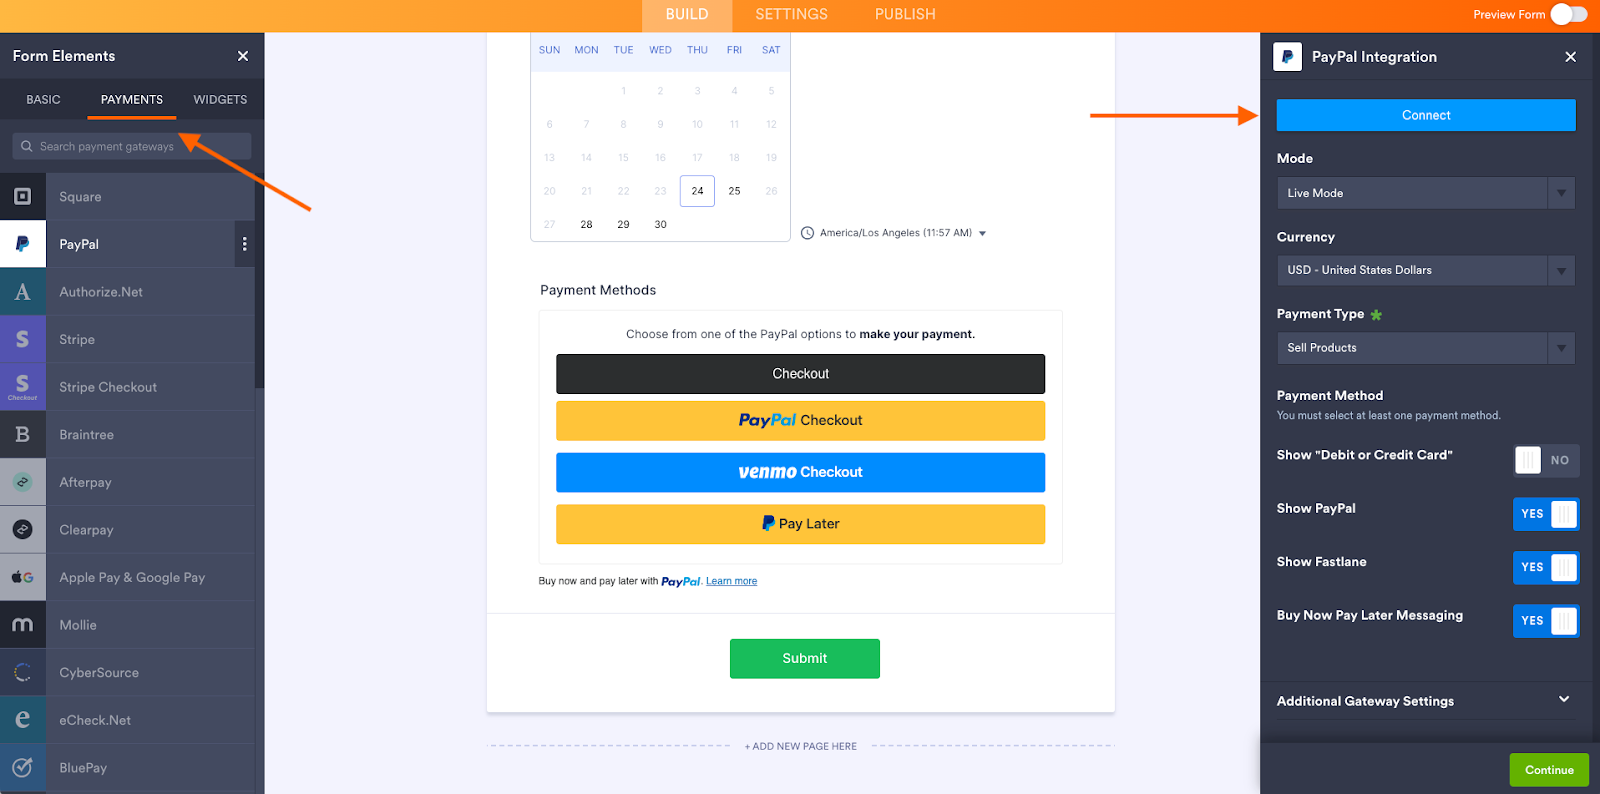
For example, instead of sending different forms to collect payments and set appointments, you can handle both simultaneously by combining Jotform Appointments with popular payment integrations like PayPal, Square, and Stripe.

You can also use conditional logic to set your pricing according to the appointment type.
Pro Tip
If you do not see a payment option, check to see that payment integrations are enabled in the Admin Console.
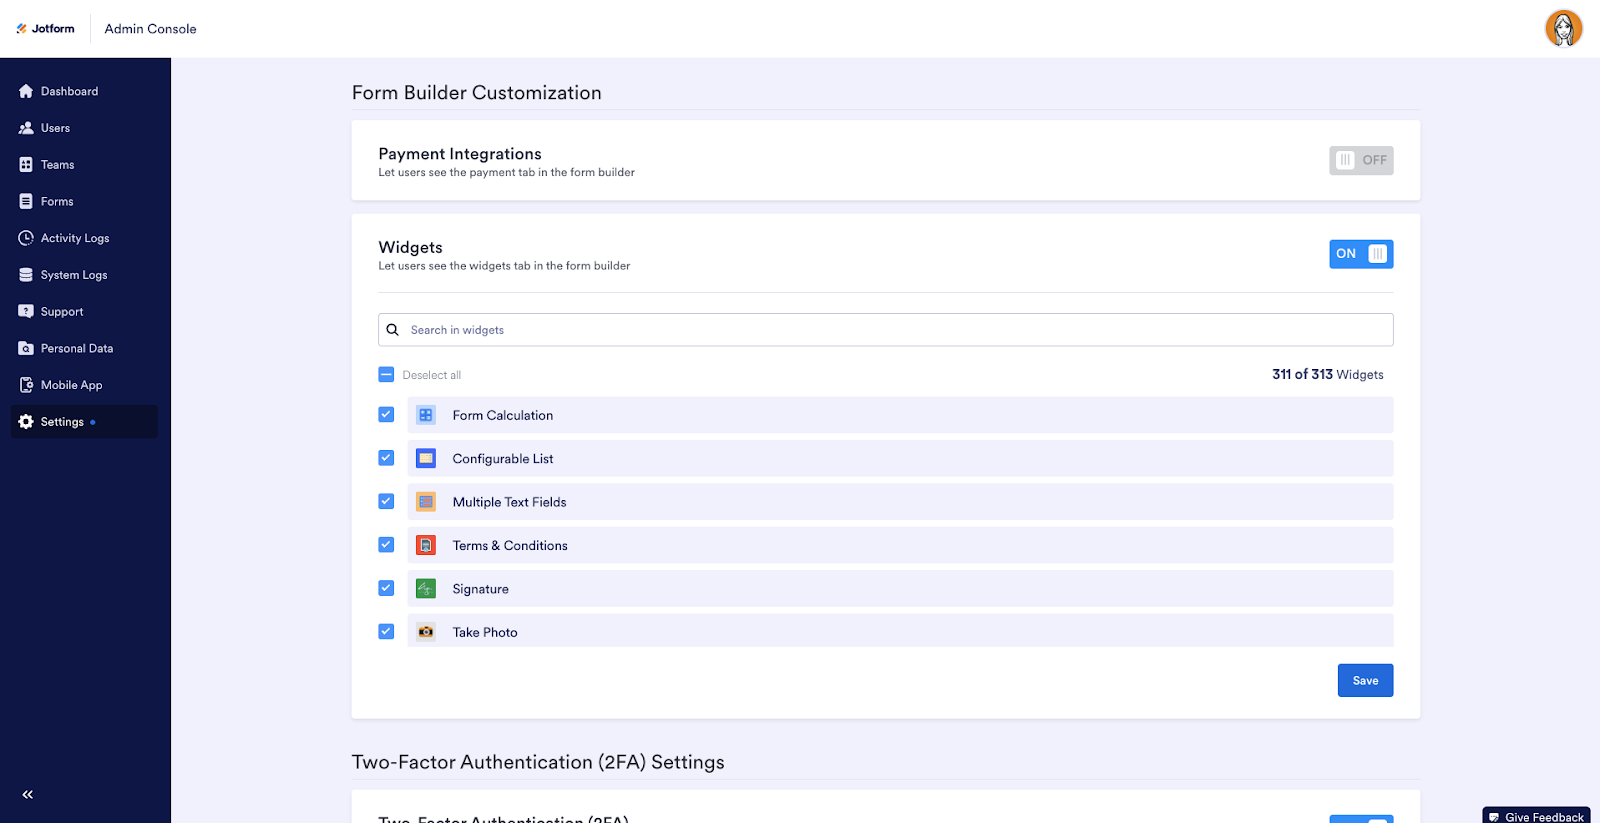
Once the payment integrations are enabled in the Admin Console, you can select which payment platforms to offer.
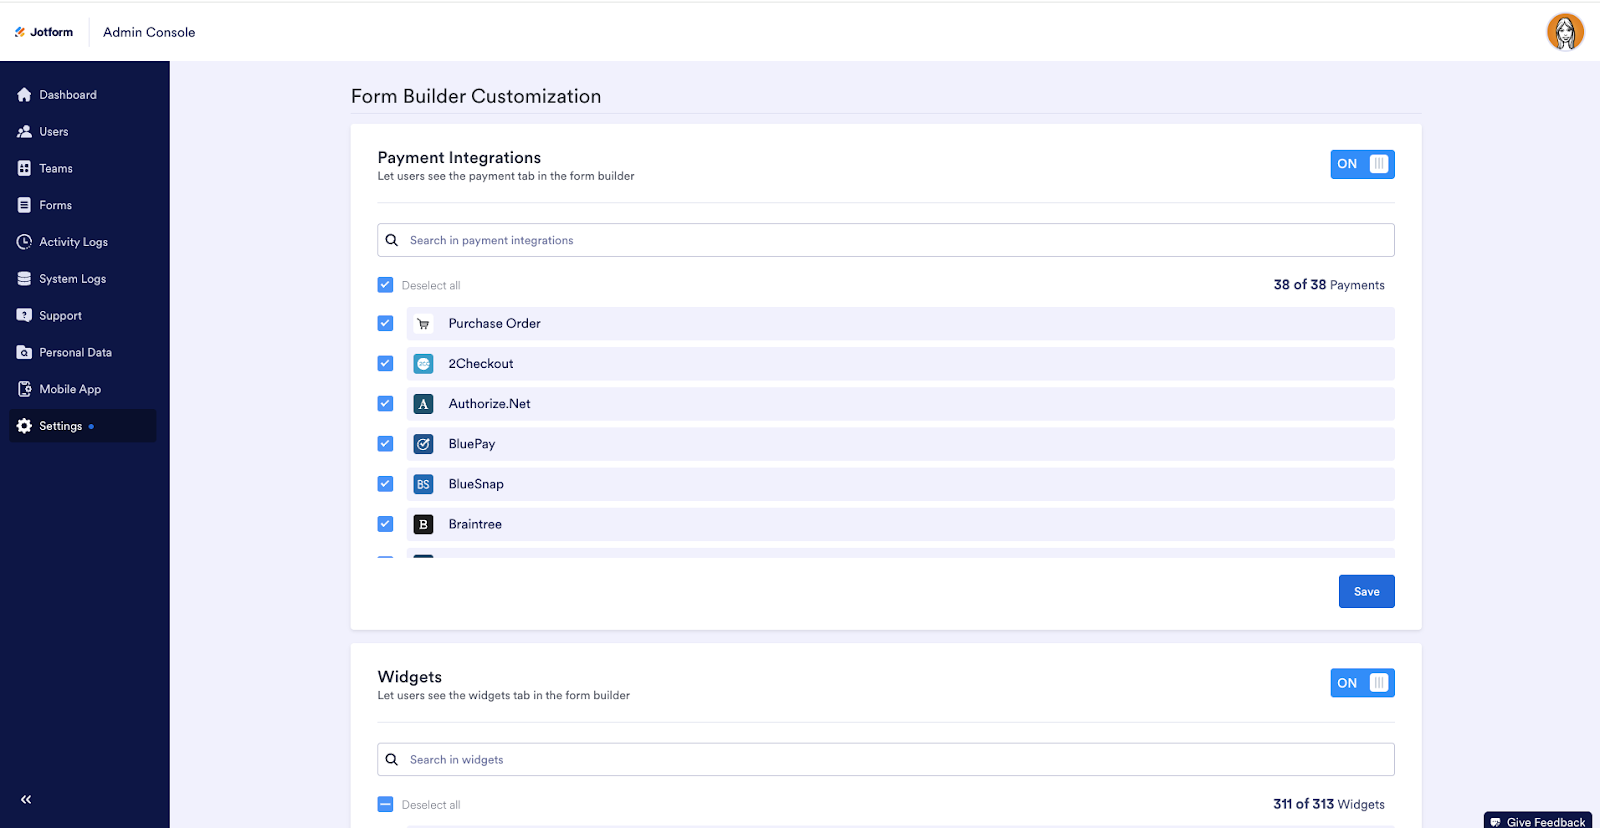
Then, you’ll be able to add a payment widget directly to your appointment form. In the Build tab of the Form Builder, select +Add Element on the left. Then click the Payments tab. Drag and drop the payment integration you want to use into your form. Follow the prompts to connect the integration and customize it to your needs.
Conclusion
Calendars are essential tools, keeping us on time and on track. With Jotform Appointments, you can seamlessly integrate Jotform Enterprise with Google Calendar, Outlook Calendar, or Calendly, three of the most popular scheduling tools for Enterprise customers, making this one of our most exciting product improvements to date.
Jotform Appointments’ two-way calendar sync identifies available time slots from your Google Calendar, Outlook Calendar, or Calendly accounts and shows them in your appointment form. Once a user submits the form, a new appointment is created in your calendar. With this functionality, as well as customizable email notifications and appointment conditions, Jotform Appointments can easily meet your scheduling needs.
Register for the Jotform Appointments webinar today to learn more.


")


 integrations for Jotform Enterprise")


Send Comment:
1 Comments:
102 days ago
With sprunki your valuable input, you've transformed my perspective—it's like seeing the world in high definition for the first time