-
Regina MartinAsked on May 10, 2025 at 8:31 PM
My computer has a sticky "C" button. It just did not register the C when I was creating the account. I have published the link to my Jotform and did not want to start over.
My account is currently bounces back as not deliverable.
-
Mafe_M JotForm SupportReplied on May 10, 2025 at 9:21 PM
Hi Regina,
Thanks for reaching out to us for help. I understand that your computer's sticky C button caused an issue when creating your account, and now your account email bounces back as not deliverable. I checked the email address, and it is currently in our bounce list.
Result:

wfn316@yahoo.com is IN the bounce list


Reason(s) : bounced (host mta7.am0.yahoodns.net[67.195.204.73] said: 552 1 Requested mail action aborted, mailbox not found (in reply to end of DATA command))


wfn316@yahoo.com is NOT in the unsubscribe list
I have removed the email address from the bounce list. We recommend adding noreply@jotform.com to your mailbox's contact list to prevent it from blocking emails from Jotform. Another way is to Whitelist Jotform domains and IPs in your web/email host to ensure that all the emails sent to you will be received successfully.
Furthermore, we also recommend configuring your email notifications to use your own SMTP. You can set up SMTP for your form for your notification and confirmation emails to minimize issues in sending and receiving emails. Let me show you how to set it up:
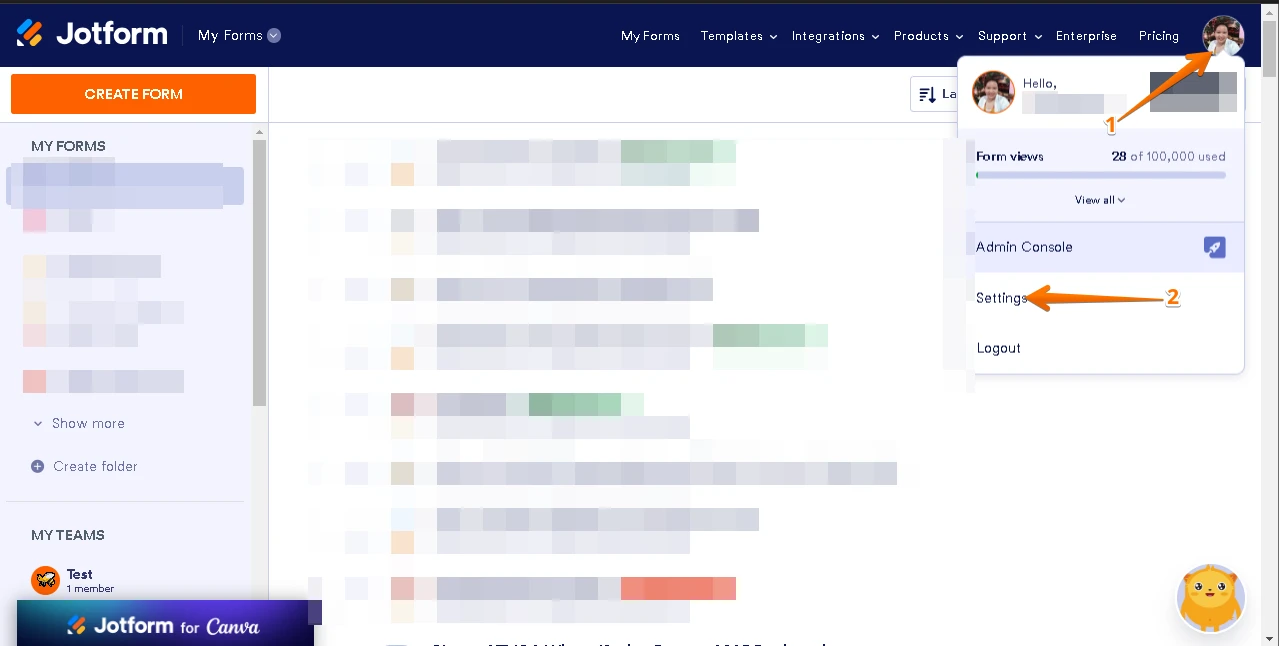
1. On your My Forms Page, click on your Profile/Avatar in the upper right corner of the page.
2. Choose Settings from the options.

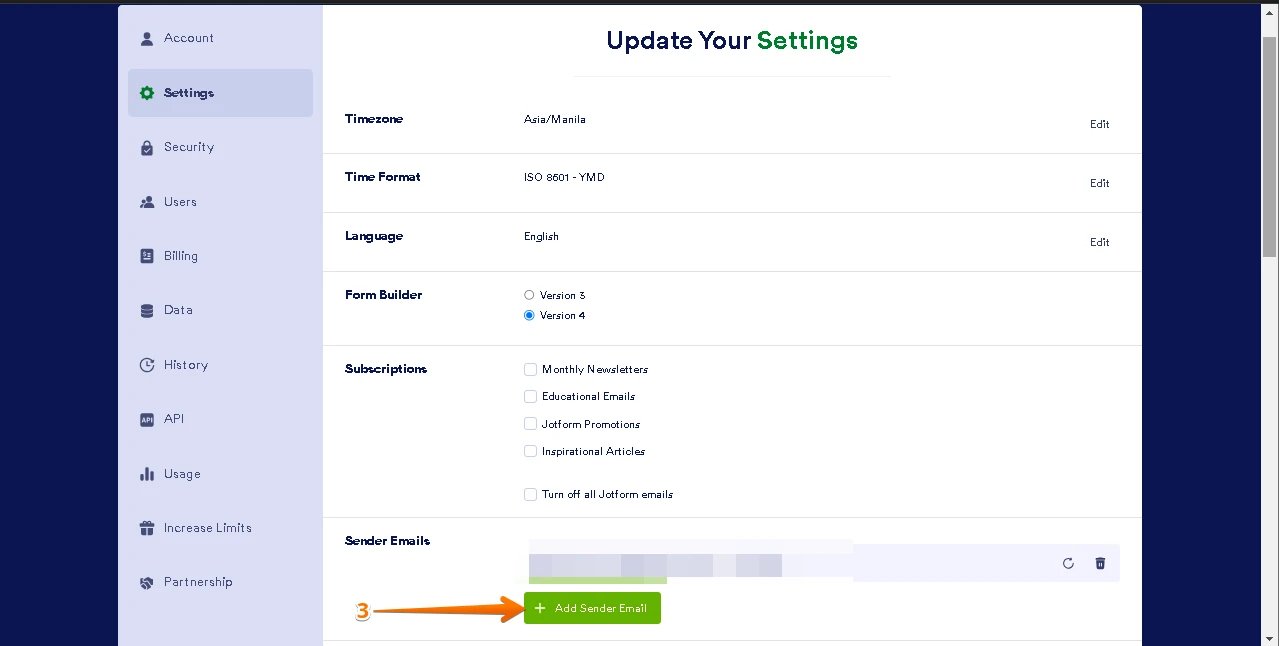
3. Under the Sender Emails, click the Add Sender Email button.
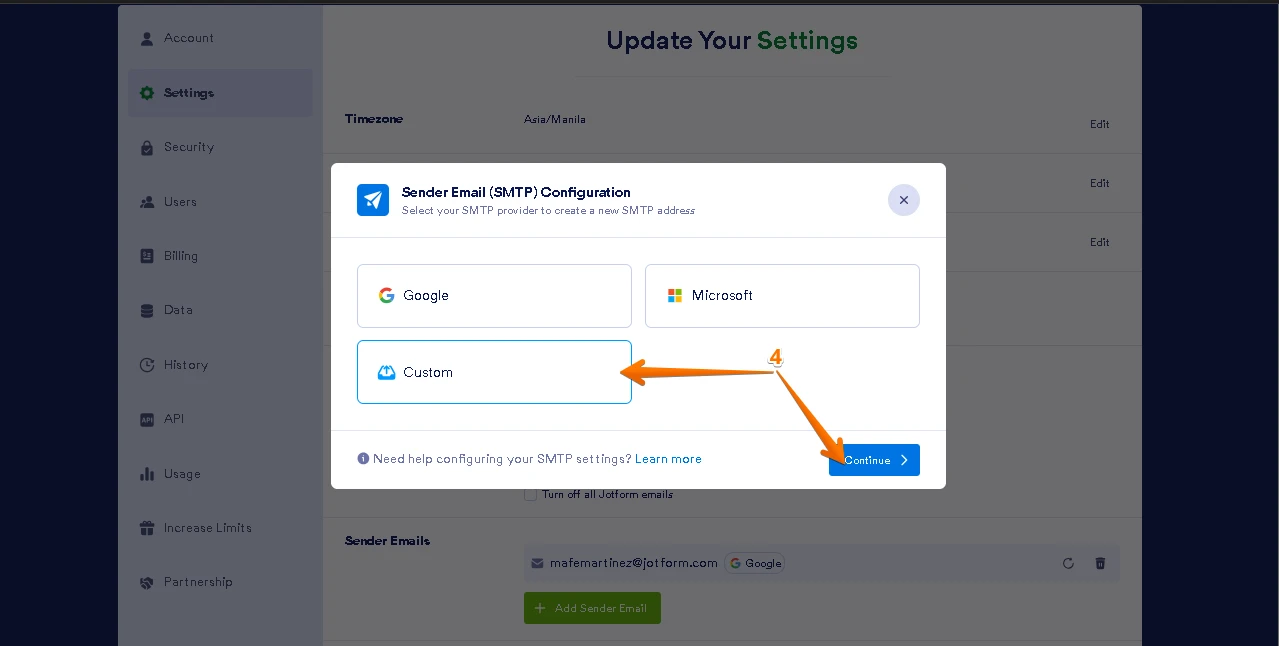
4. Select the Custom option and click on Continue. If you are using Gmail, then you can select Google. If you are using Microsoft Email, select Microsoft.
5. Enter SMTP details and once done click Sent Test Email.
6. If it works, click the blue Save button. Otherwise, correct the details.
Here's the guide to get the correct SMTP details:- Email Address: Your email address.
- Host Name: The hostname provided by your hosting provider.
- Port: 587 or 465.
- Username: Your email address. Unless the hosting provider specifies a unique username, this should be the same as the email address.
- Password: The password for the given email address/username.
- Security Protocol: TLS or SSL.
Also, you can test your SMTP configuration first to ensure they are correct and working. You can test your SMTP configurations on this site. Make sure to change your email account password after testing or before your test, change it to a different password first.
If you receive SMTP errors while entering the SMTP credentials, I suggest you visit this page for instructions on how to fix them. Once you successfully set up the SMTP to your account, you'll need to add your email that will serve as a sender email. Let me walk you through it:
1. In the Form Builder, click on Settings in the orange navigation bar at the top of the page.
2. Go to the Emails tab in the left-hand side of the page
3. Hover your mouse over the Notification Banner and click on the Pencil icon to edit the Notification Email.
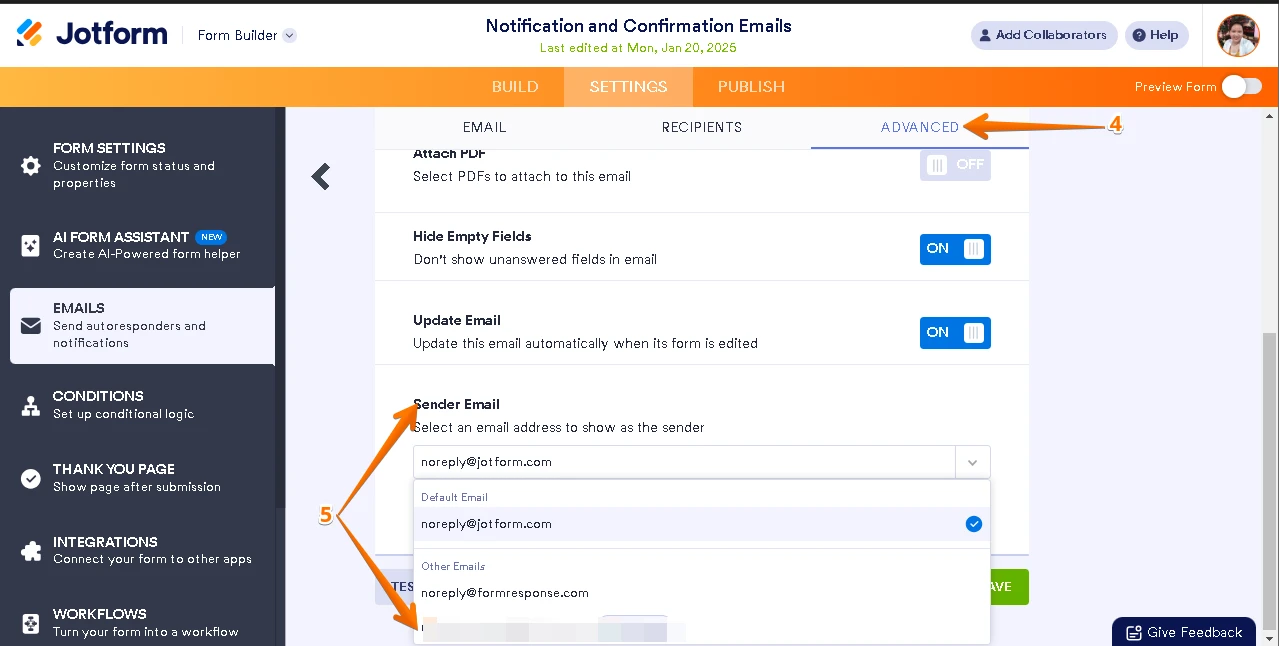
4. Under the Email Settings, go to the Advanced tab.
5. Click on the dropdown option below Sender Email and select the preferred email.
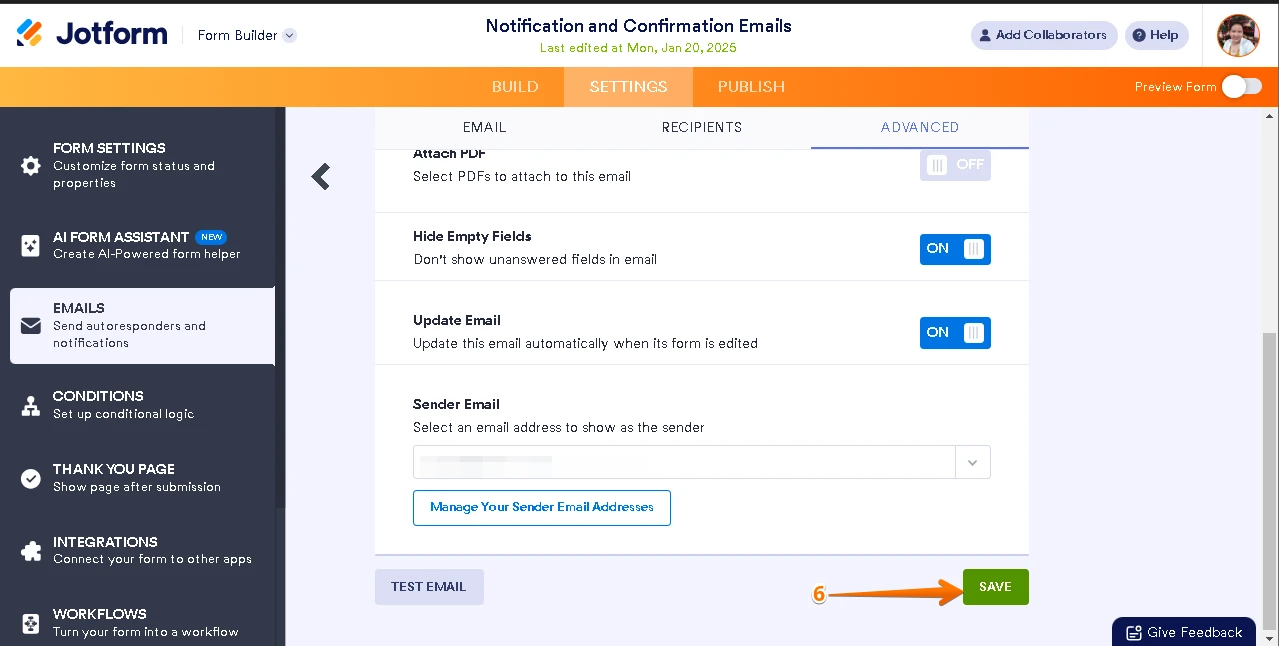
6. Click on Save to keep the changes.
Also, if you have registered for an incorrect email address, it can get correct by updating the email address in the account settings. You can also fill out the Account Recovery Form to correct the email address.
Give it a try and let us know if you need help.

 Here's the guide to get the correct SMTP details:
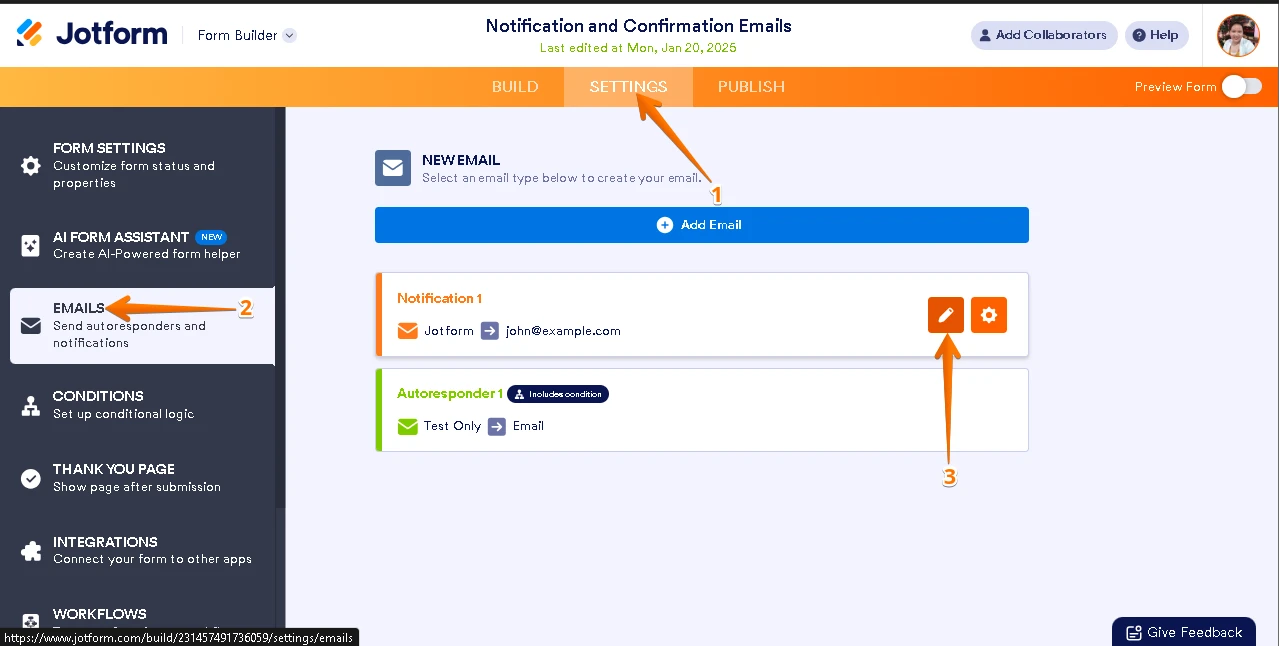
Your Answer
Something Went Wrong
An error occurred while generating the AI response. Please try again!