-
Kağan EceAsked on May 7, 2025 at 6:34 AM
How to set up SMTP for a form
-
Podo: Support AI AgentReplied on May 7, 2025 at 6:34 AM
Hi Kağan Ece,
Thanks for reaching out to Jotform Support. I'm an AI assistant. I'll do my best to help you until someone from the support team is available.
Let me walk you through how to set up SMTP for your form:
Prerequisites:
- You need to have your SMTP credentials ready. Contact your email service or hosting provider if you don't have these details.
- If required by your hosting provider, whitelist Jotform IP addresses to allow sending emails through their SMTP server.
Steps to add and set up SMTP in your Jotform account:
- Log in to your Jotform account and click your Profile Picture in the navigation menu.
- Click Settings from the submenu.
- Under the Sender Emails section, click Add Sender Email.
- Select your SMTP provider from the list: Google, Microsoft, or Custom.
- If you choose Custom, enter the SMTP details such as SMTP Account Username (usually your email), SMTP Account Password, Host Name, Email Address, Security Protocol (TLS or SSL), and Port (587 for TLS or 465 for SSL).
- Send a test email to confirm the SMTP settings are correct.
- If the test is successful, click Save to complete the setup.
Using the custom sender email in your form:
- Go to your form in the Form Builder and open the Settings tab.
- Click Emails on the left panel.
- Edit your notification or autoresponder email by clicking the Pencil Icon.
- Under the Advanced tab, select your newly added custom sender email from the Sender Email dropdown.
This setup helps maintain your brand identity and improves email deliverability by using your own domain's email server.
If you have any questions or need further assistance, feel free to ask.
Give it a try and let us know how it goes.
-
Dayron JotForm SupportReplied on May 7, 2025 at 9:05 AM
Hi Kağan,
Thanks for reaching out to Jotform Support. You can easily set up a custom SMTP to use your email sender as provider. Let me walk you through it:
1. Go to the Settings page while logged in to your Jotform account and click on Add Sender Email in the Sender Emails section.

2. In the window that opens, select Custom and click on the Continue button.
3. Enter your email provider's details, click on Send Test Email to check if it’s set up correctly, and then click on Save.
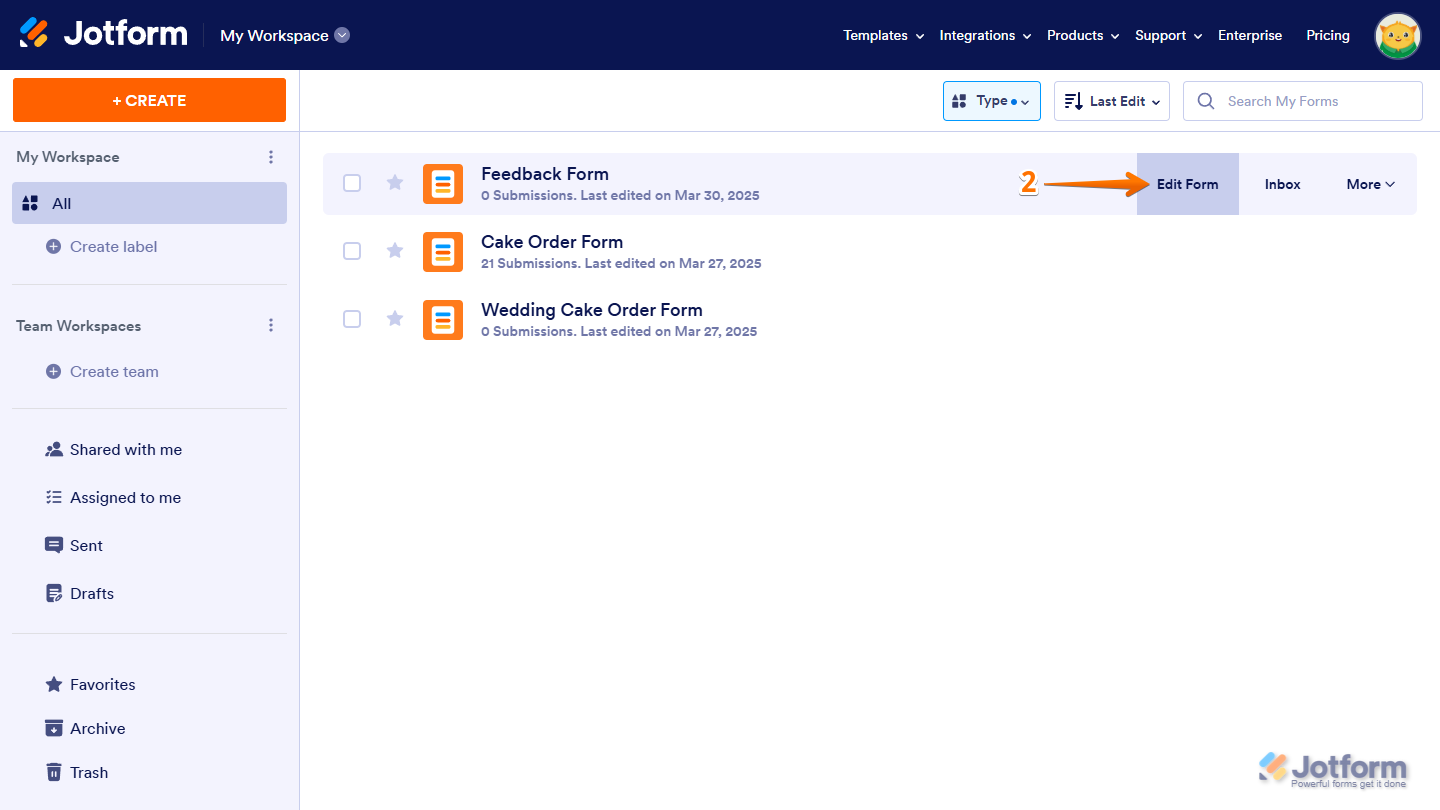
You only need to set up the custom sender email once, and you can use it across all the form assets in your account. Here’s how:1. On your My Workspace page, click on Type at the top and in the Dropdown menu that opens, uncheck the boxes next to all the assets except Forms, so only they’ll be shown on the page.
2. Then, hover your mouse over the form you want to set up a custom sender email for, and click on Edit Form on the right side of the page.
3. Now, in Form Builder, in the orange navigation bar at the top of the page, click on Settings.4. Next, click on Emails in the menu on the left.
5. Hover your mouse over the Notification Email or Autoresponder Email and click on the Pencil icon to edit it.
6. Now, go to the Advanced tab.7. Then, click on the Sender Email Dropdown menu and select your custom sender email.
8. After that, click on Save.Give it a try and let us know if you need any help.


 You only need to set up the custom sender email once, and you can use it across all the form assets in your account. Here’s how:
 3. Now, in Form Builder, in the orange navigation bar at the top of the page, click on Settings.
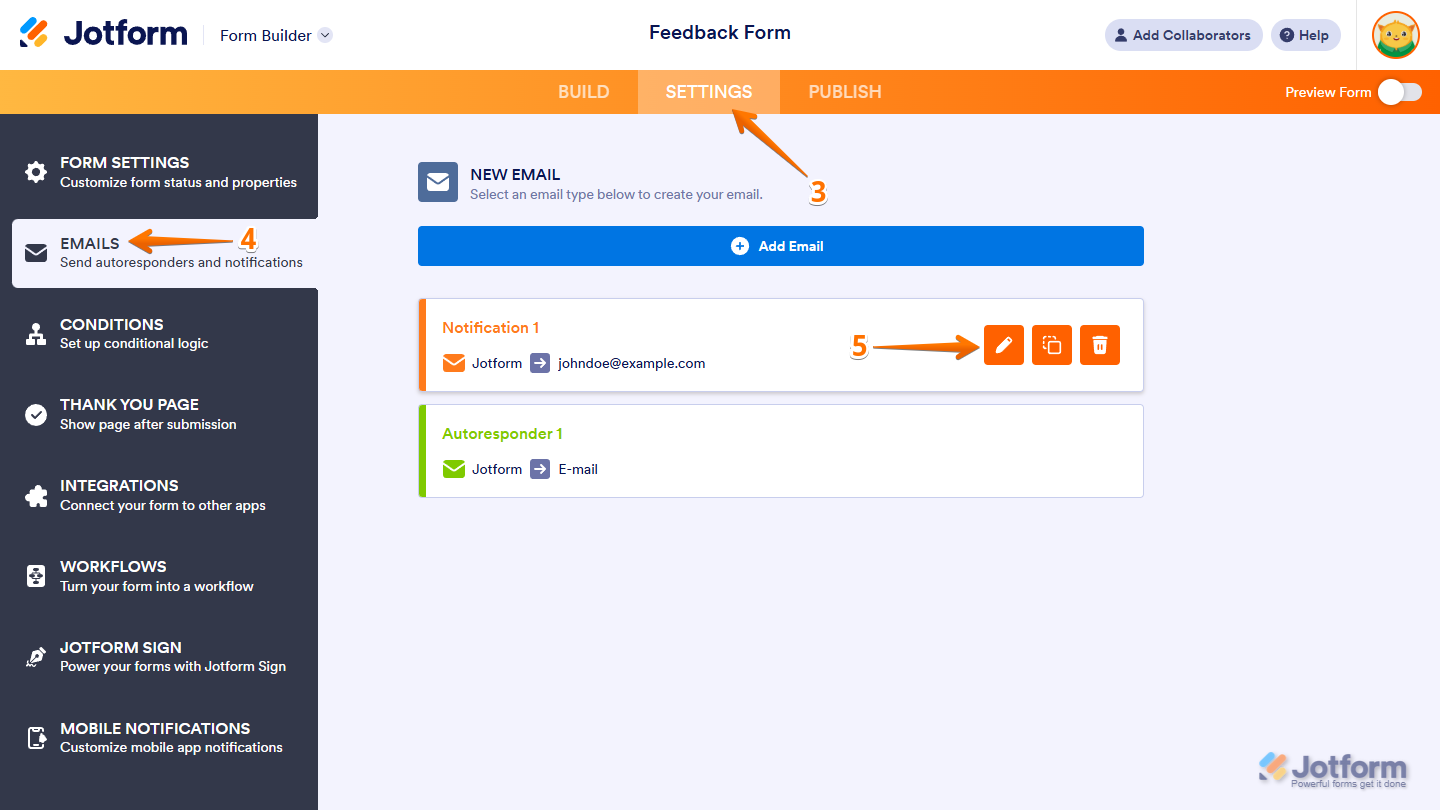 6. Now, go to the Advanced tab.
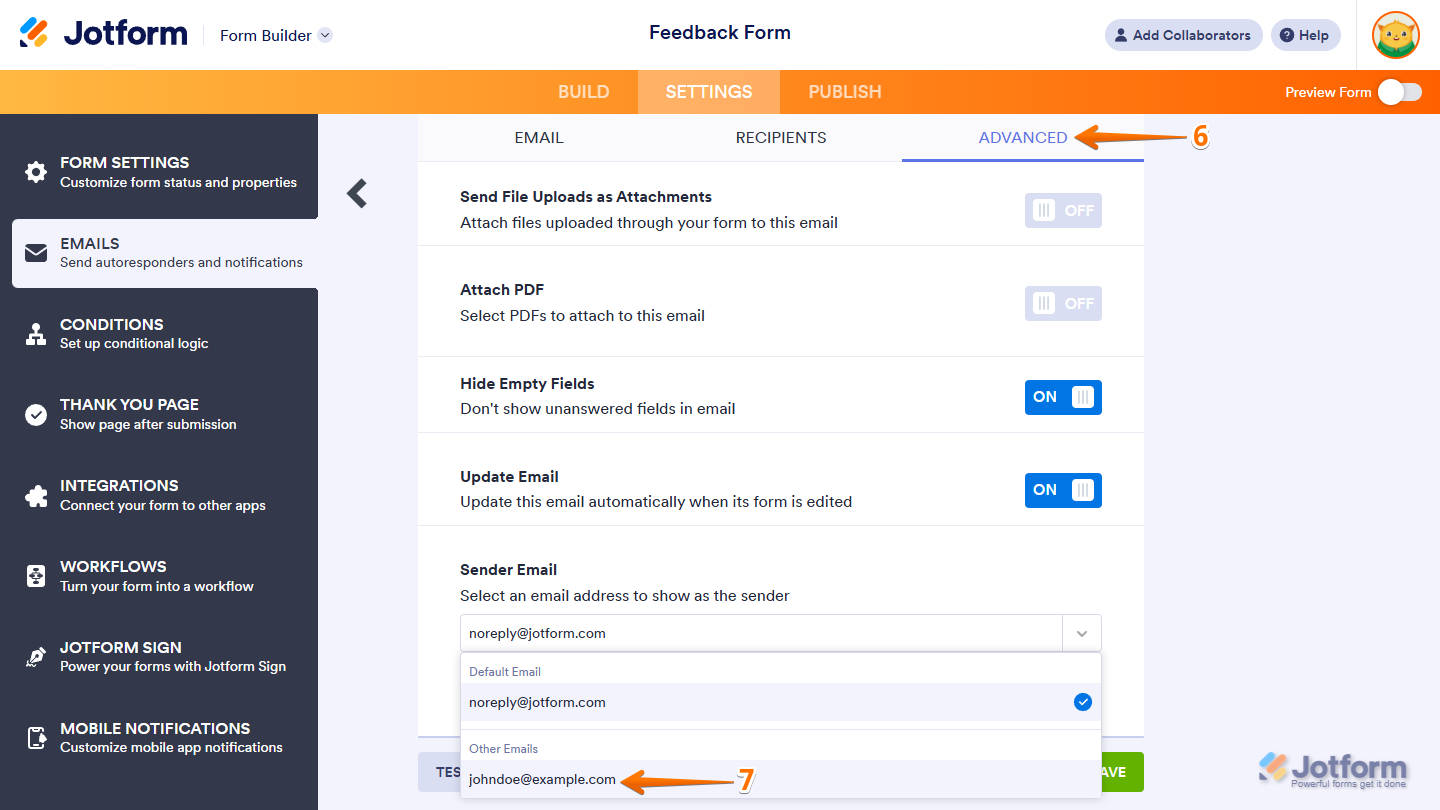 8. After that, click on Save.
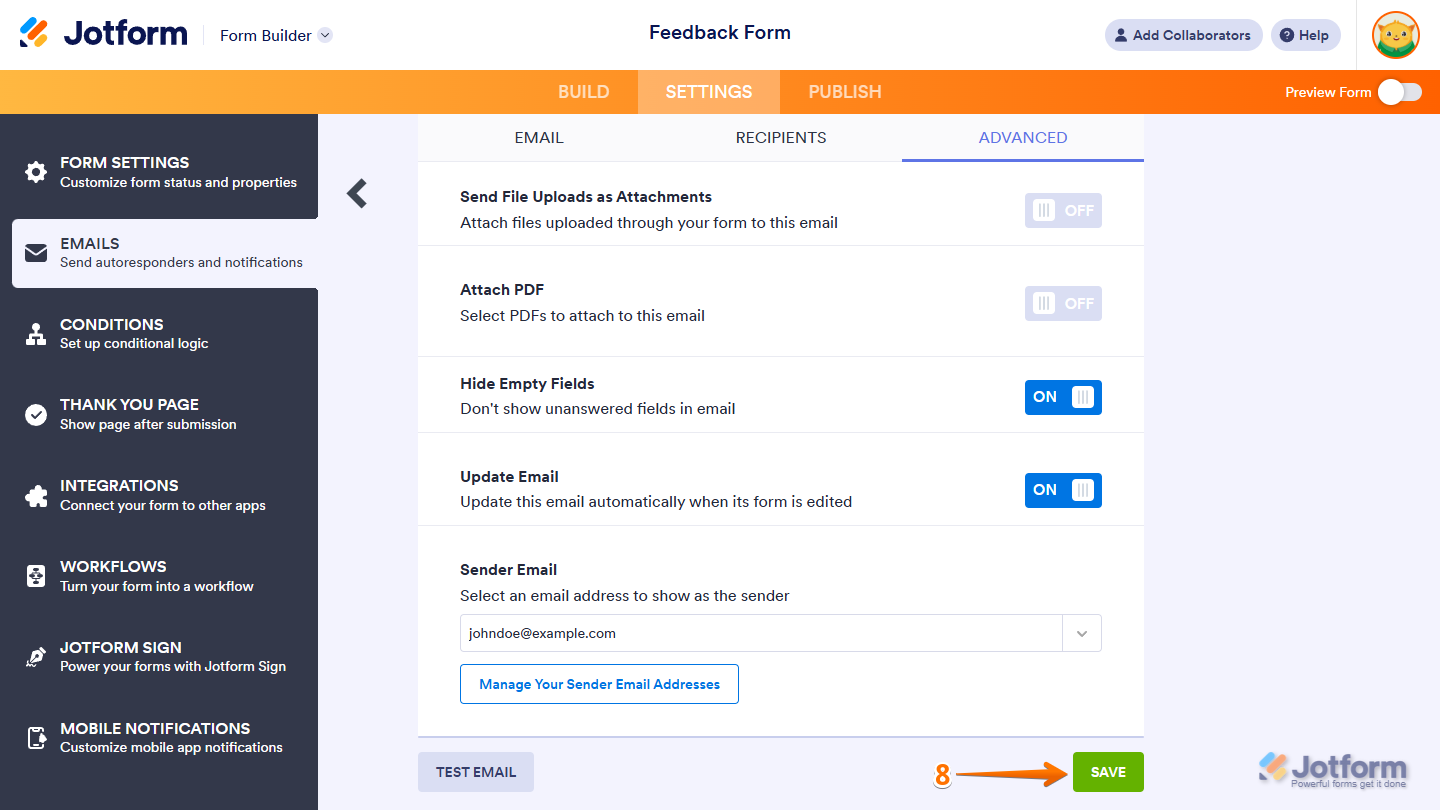 Give it a try and let us know if you need any help.
Your Answer
Something Went Wrong
An error occurred while generating the AI response. Please try again!