


-
karthiktshAsked on September 18, 2024 at 10:38 PM
Hello Team,
We manage properties for over 150 individuals, and we use HubSpot as our CRM while storing additional data on Xero and Monday.com. Due to new government regulations, we need to collect additional information from our clients, such as:
- Name, phone, email, home address
- Personal tax number for individuals
- GST tax number for organizations
- Date of birth
- Bank account number
- Business registration number for businesses
We already have about 50% of this information for most of our clients. Instead of sending them a generic form that asks for all information again (which could frustrate them), we are looking for a solution that allows us to:
Import the data we already have (e.g., name, email, etc.) into your platform.
Send each client a personalized link to a form or profile page where they can see the information we already have.
Allow them to update any incorrect data and fill in any missing fields.
Is this something your platform can support? If so, could you provide more information on how we can achieve this with your system?
Thank you for your assistance!
Best regards,
Karthik Hariharan
-
Shane JotForm SupportReplied on September 19, 2024 at 3:16 AM
Hi Karthik,
Thanks for reaching out to Jotform Support. Yes, Jotform supports Importing Data in Jotform Tables, which you can then use to prefill your forms and send them to your clients for them to continue filling out and/or update some of their information. I can walk you through setting that up.
First is to import your data to a Jotform Table:
- Go to My Tables page, then click the Create Tables button.

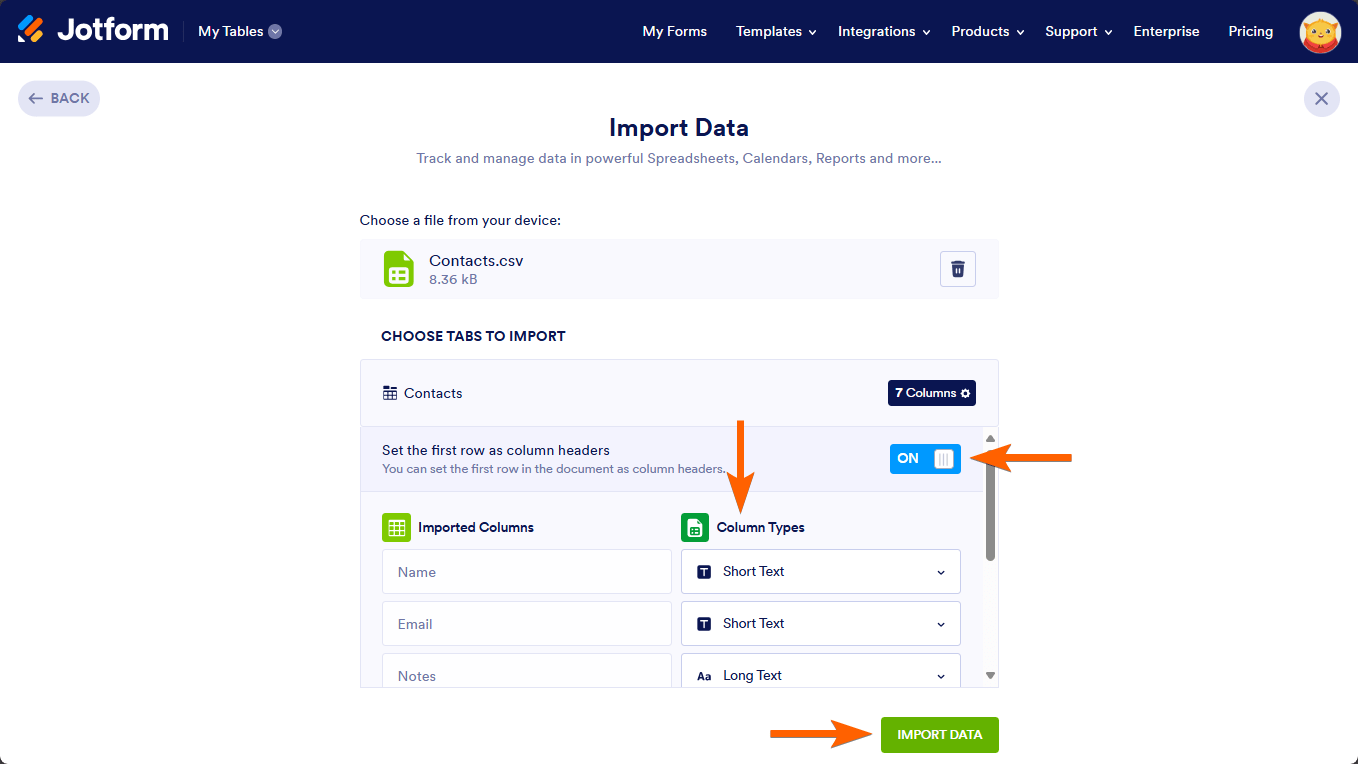
2. Select Import Data.
3. Upload your Excel or CSV file.
4. Turn on the Set the first row as column headers option and change the column types if needed.
5. Select Import Data when done.Once done, you can then proceed to prefill your form with data from Jotform Tables:
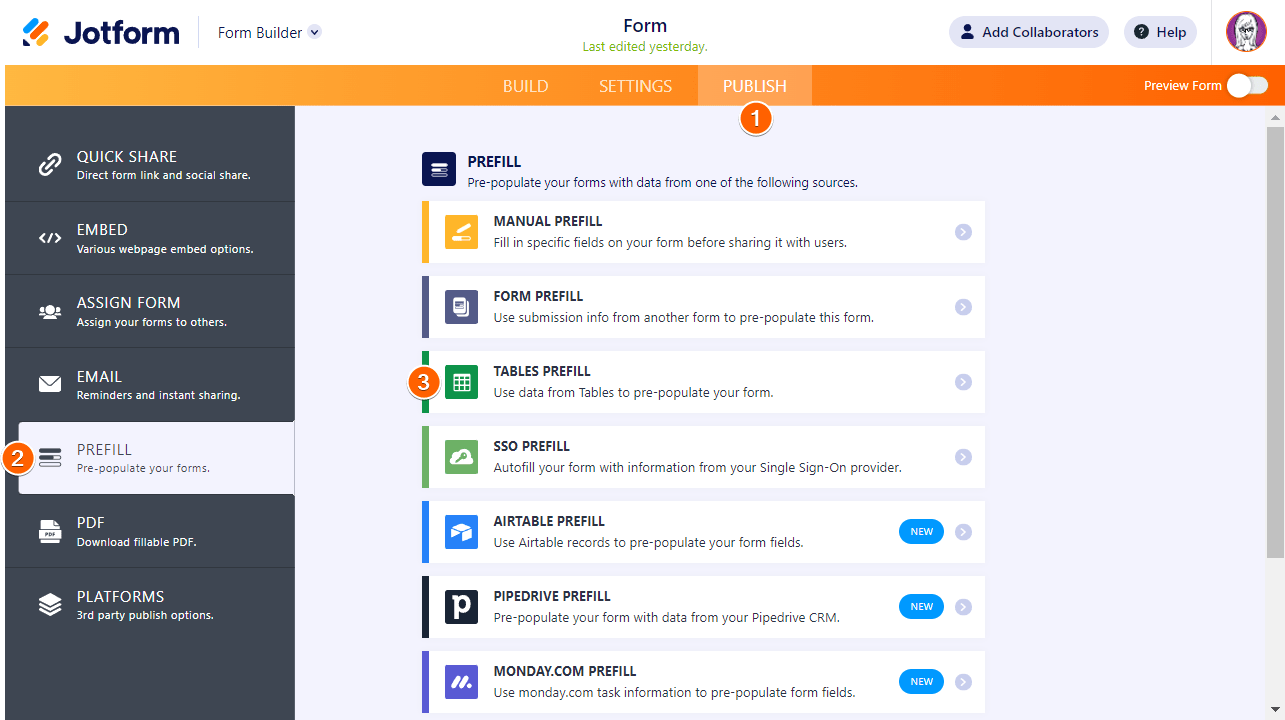
- In the Form Builder, click Publish at the top navigation bar.
- Select Prefill from the left menu.
- Click on Tables Prefill.
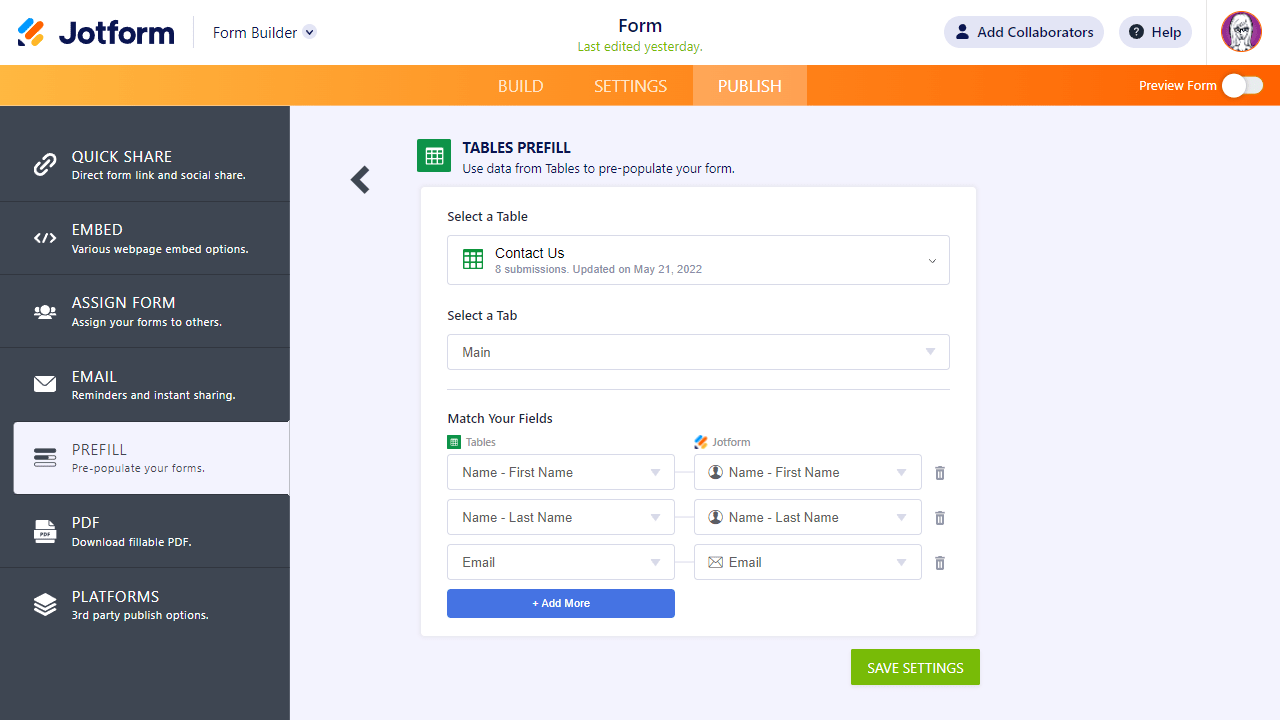
3. Select your table and set the tab.
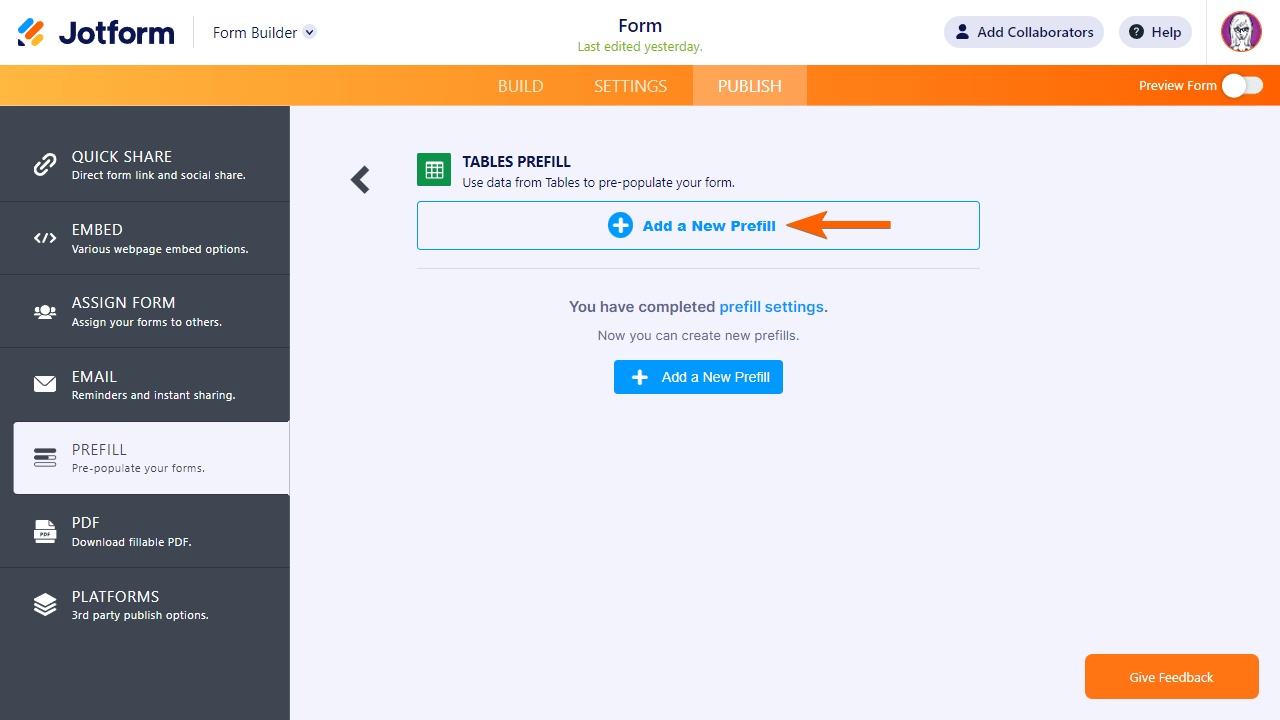
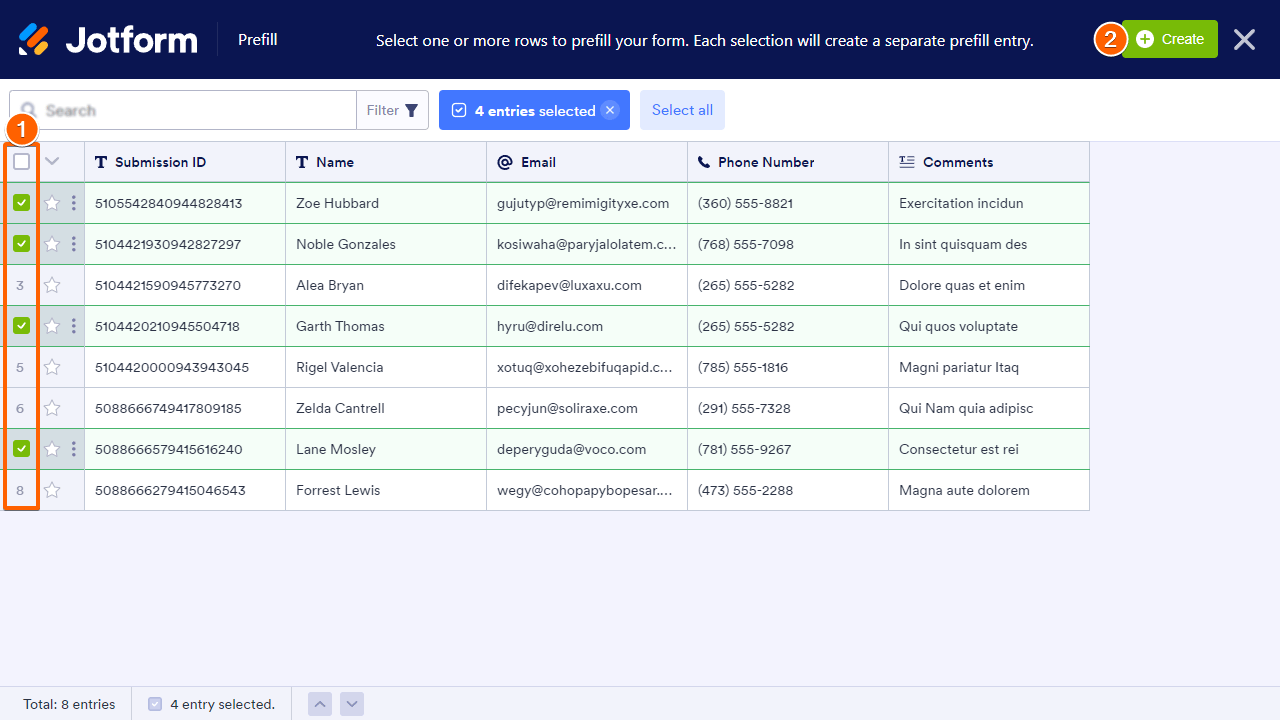
4. Map your table’s columns to your form fields to match the data, then select Save Settings.5. Select Add a New Prefill in the following page.
6. Choose the entries to prefill your form, then select Create in the upper-right corner.
Finally, you can now copy and share your prefilled URLs. Use the prefill menu to manage your prefills.We also have a guide about How to Prepopulate Form Fields With Data From Other Tables that you can check out.Give it a try and let us know if you have any other questions.
- Templates
- Integrations
- Products
- PRODUCTS
- Form Builder
- Jotform Enterprise
- Jotform Apps
- Store Builder
- Jotform Tables
- Jotform Inbox
- Jotform Mobile App
- Jotform Approvals
- Report Builder
- Smart PDF Forms
- PDF Editor
- Jotform Sign
- Jotform for Salesforce Discover Now
- Support
- GET HELP
- Contact Support
- Help Center
- FAQ
- Dedicated Support
Get a dedicated support team with Jotform Enterprise.
Contact Sales - Professional ServicesExplore


 Finally, you can now copy and share your prefilled URLs. Use the prefill menu to manage your prefills.
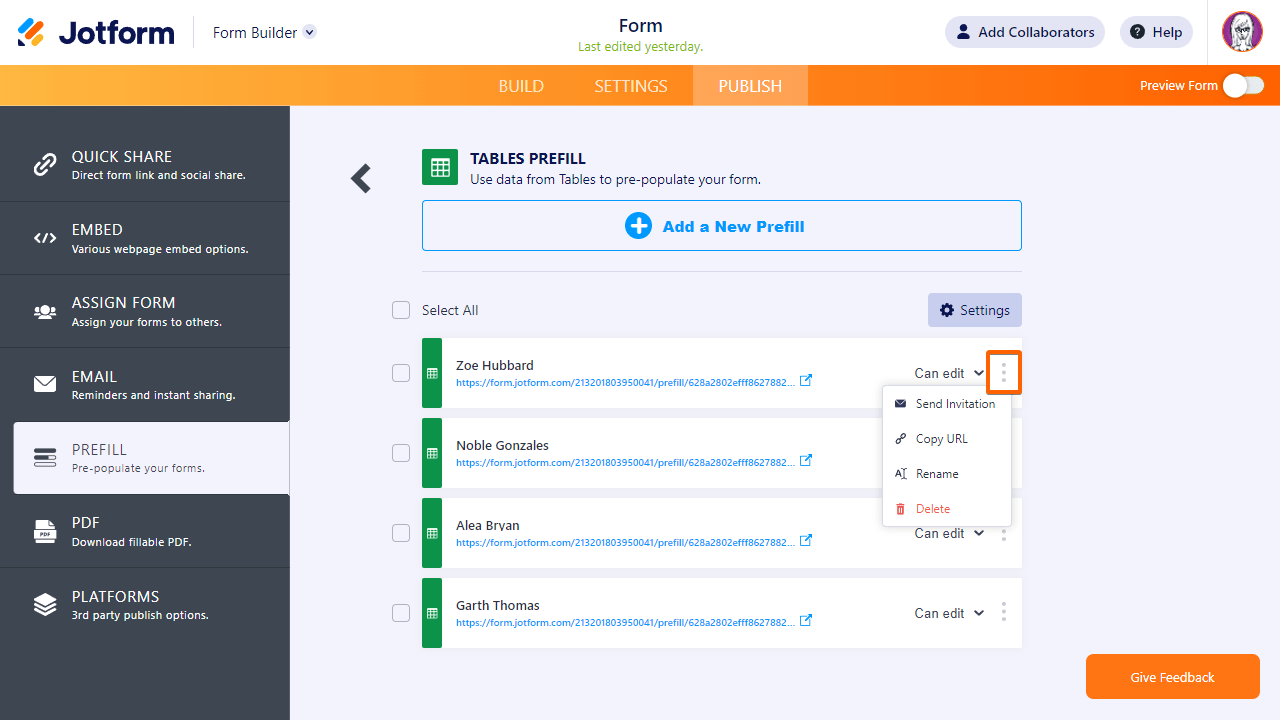 We also have a guide about